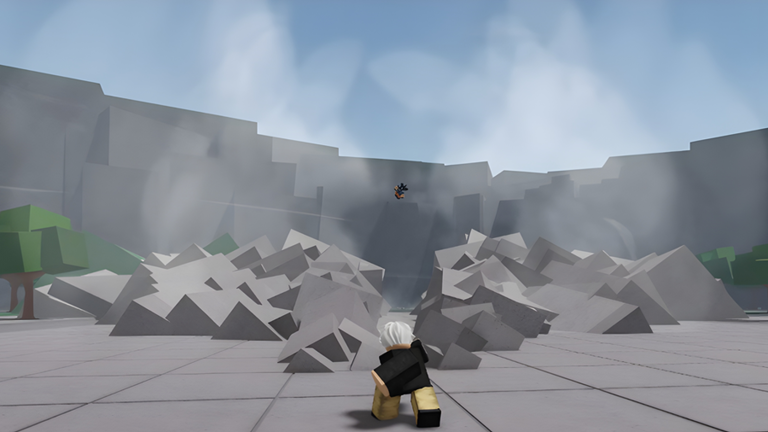
The Strongest Battlegrounds 2026
Ultimate Awakening Tier List Meta
Ultimate Awakening Moves Tier List The Strongest Battlegrounds: Matrix Ranking, Frame Data, I-Frames And Oneshot Combo Guides 2026
The definitive competitive encyclopedia for Awakening and Ultimate Moves in The Strongest Battlegrounds on Roblox: Comprehensive tier ranking from Tier Z+ to Tier S, detailed frame data breakdown (Startup and I-Frames), guard break mechanics, devastating oneshot combos, and advanced rage meter management strategies for competitive 1v1 ranked duels.
Executive Summary: Core Awakening Rules And Strategic Principles
- The Decisive Power of Awakening: In The Strongest Battlegrounds (TSB), your Awakening Meter represents your highest-value tactical resource. Triggering Awakening transforms your character into an unstoppable force with entirely new specialized movesets, a 3x to 5x damage multiplier, and the ability to flip lost duels within seconds.
- Guard Break Versus Unblockable Mechanics: Most Ultimate finishers feature either unblockable properties or automatic guard-breaking mechanisms, combined with extensive Invulnerability Frames (I-Frames) that prevent opponents from interrupting or punishing the execution sequence.
- Ragdoll Burst Awakening Technique: Pressing the [G] key while knocked down into a ragdoll state or trapped inside an enemy combo triggers an explosive shockwave that knocks back all nearby adversaries, instantly converting defensive disadvantage into offensive dominance.
- Awakening Timer Optimization: Awakening duration spans from 30 to 45 seconds depending on character archetype. Top-tier tournament competitors structure their cooldowns carefully to secure 2 to 3 decisive combo sequences before the rage bar expires.
- Anti-Awakening Stalling Tactics: When an adversary activates Awakening, your primary survival objective is defensive stalling. Utilizing elevated geometry, 45-degree angle side-dashing, and baiting whiffed attacks effectively burns through the enemy rage timer without taking catastrophic damage.
1. System Architecture: Rage Generation, Activation Protocols And Frame Data Analytics
The Awakening state within The Strongest Battlegrounds is far more than an aesthetically impressive transformation; it operates as a sophisticated mathematical system dictating combat tempo, priority hierarchies, and damage scaling. Mastery over ranked leaderboards requires a deep comprehension of how rage points are calculated behind the scenes.
The Awakening Bar located at the top center of your screen accumulates through two distinct channels: Damage Dealt to opponents and Damage Sustained from incoming strikes. The underlying combat algorithm incorporates an aggressive Comeback Multiplier: when your health drops below 50% HP, rage points gained from taking damage increase significantly, ensuring that trailing combatants always maintain a viable pathway to turn the tide of battle.
Four Fundamental Principles of the TSB Awakening Engine:
1. Dual Rage Accretion & Comeback Scaling
Offensive M1 neutral strikes and basic abilities generate approximately 1.5% to 3.0% rage per successful hit. In contrast, sustaining enemy damage yields 4.0% to 6.0% rage per 10% maximum health lost. This dynamic ratio guarantees that intense 1v1 engagements naturally culminate in high-stakes Awakening confrontations.
2. Activation Animation & Absolute Invulnerability
Pressing [G] at 100% rage initiates a transformation sequence granting absolute Invulnerability Frames (1.2 to 2.5 seconds). During this phase, you ignore all incoming damage, bypass status debuffs (Stun, Freeze, Bleed), and radiate an outward shockwave that repels opponents.
3. Linear Rage Decay & Ultimate Resource Burn
Upon entering Awakening, the rage bar converts into a countdown timer: 35 seconds for Saitama, 40 seconds for Garou and Genos, and 45 seconds for Atomic Samurai. Executing game-ending super moves like Serious Punch instantly burns all remaining rage meter.
4. Guard Break Versus True Unblockable Classification
TSB Ultimates are bifurcated into Guard Break attacks (shattering the opponent guard stance and applying a 20% stagger vulnerability penalty) and Unblockable attacks (ignoring block inputs entirely to deliver 100% unmitigated true damage directly to the health pool).
2. Visual Matrix Board: 10 Paramount Awakening Moves In The Strongest Battlegrounds
Here is the comprehensive technical matrix analyzing the 10 most impactful Awakening abilities in the competitive TSB meta, evaluated across startup latency, invulnerability windows, damage coefficients, and neutral game viability:
RANK 01: SERIOUS PUNCH (THE STRONGEST HERO / SAITAMA)
TIER Z+ (ABSOLUTE ONESHOT)
Startup Frames
450 ms (Moderate)
Invulnerability (I-Frames)
1.8s Full Immunity
Damage Output
100% HP (Instant Kill)
Block Penetration
True Unblockable
Technical Breakdown: Saitama Serious Punch represents the pinnacle of destructive capability in Roblox battlegrounds. Activating ability slot 4 during Serious Mode triggers a dramatic windup followed by an atmospheric shockwave spanning a 60-meter forward cone. The strike inflicts 100% maximum HP damage, terminating any target caught within the blast radius while consuming all remaining Awakening timer.
Pro Execution Strategy: Never launch Serious Punch in open terrain against opponents holding full dash charges. Corner the adversary against structural boundaries, confirm the hit immediately following a Table Flip knockdown, or execute right as the opponent commits to a whiffed offensive strike.
RANK 02: COLLAPSING STAR ROAR CANNON (BOROS / ALIEN WARLORD)
TIER Z+ (MAP DEVASTATION)
Startup Frames
600 ms (Energy Charge)
Invulnerability (I-Frames)
2.2s Extended Shield
Damage Output
100% HP (Annihilation)
Block Penetration
Complete Piercing
Technical Breakdown: Boros supreme celestial attack channels cosmic energy into a 25-meter-wide beam that pierces through all building geometry and map assets across an 80-meter line. It delivers instantaneous disintegration to any entity intersecting the beam path.
Pro Execution Strategy: With a 600ms startup phase, opponents have time to dash behind solid cover if launched raw. Always precede this finisher with Moon Kick, launching the adversary into terminal upward velocity where they cannot activate horizontal evasive dashes.
RANK 03: FINAL HUNT (MONSTER GAROU / HERO HUNTER)
TIER Z (TRUE GRAB ONESHOT)
Startup Frames
280 ms (Hyper-Fast)
Invulnerability (I-Frames)
1.5s Cinematic Lock
Damage Output
85% - 95% HP
Block Penetration
Auto Guard Break
Technical Breakdown: Monster Garou dashes forward with predatory speed, seizing the opponent by the cranium and slamming them repeatedly into the earth before launching them skyward for a crushing ground pound. The cinematic lock prevents camera readjustment and eliminates all evasive counter-measures for 3.0 seconds.
Pro Execution Strategy: Final Hunt chains seamlessly following the 3rd M1 neutral hit or immediately after a Lethal Whirlwind Stream wall splat. Any target sitting below 90% health is instantly eliminated once the grab connects.
RANK 04: MAXIMUM OUTPUT INCINERATION CANNON (GENOS / CYBORG)
TIER Z (LONG-RANGE CORE)
Startup Frames
320 ms (Rapid Fire)
Invulnerability (I-Frames)
1.4s Sustained Beam
Damage Output
80% - 90% HP + Burn
Block Penetration
Shield Melt & Guard Break
Technical Breakdown: Genos exposes his dual-core combustion chambers to project a searing plasma torrent reaching temperatures of several million degrees. The beam maintains active hitboxes for 2.5 seconds, continuously pushing targets backward while applying a lingering Burn status that drains an additional 15% HP post-impact.
Pro Execution Strategy: Highly lethal in enclosed corridors or when trapping opponents against arena perimeter walls. Execute following a Jet Dive landing to punish adversaries during their landing recovery frames.
RANK 05: TRUE ATOMIC SLASH (ATOMIC SAMURAI / BLADE MASTER)
TIER S+ (SPATIAL CLEAVE AUTO-TRACK)
Startup Frames
240 ms (Blistering)
Invulnerability (I-Frames)
1.6s Dimensional Shift
Damage Output
75% - 85% HP
Block Penetration
Guard Break & Stagger
Technical Breakdown: Unsheathing the legendary Sun Blade during Awakening allows Atomic Samurai to vanish from standard space and slice the surrounding 18-meter sphere into thousands of subatomic fragments. The ability features magnetic target lock-on, completely negating lateral dodging attempts.
Pro Execution Strategy: Upon sheathing the katana, a secondary Slash Detonation triggers, dealing delayed burst damage. Utilize the lingering stun to follow up with an atmospheric range slash to guarantee round conclusion.
RANK 06: MAXIMUM BEATDOWN (METAL BAT / BRUTAL DEMON)
TIER S+ (SUPER ARMOR COMEBACK)
Invulnerability (I-Frames)
Super Armor (Poise)
Damage Output
70% - 90% HP (Low HP Scale)
Block Penetration
Crushing Guard Break
Technical Breakdown: Metal Bat indomitable fighting spirit scales inversely with his current health pool. Maximum Beatdown unleashes a barrage of gravity-defying bat strikes protected by impenetrable Super Armor, rendering the character immune to knockbacks and flinches while pulverizing enemy defenses.
Pro Execution Strategy: When your HP drops below 20%, the damage coefficient reaches its peak 90% threshold. Bait the adversary into an aggressive engagement, absorb their strike using Super Armor, and counter with Maximum Beatdown for the ultimate comeback victory.
RANK 07: TENFOLD FUNERAL (SPEED-O'-SOUND SONIC / DEADLY NINJA)
TIER S (SUPERSONIC BLITZ)
Startup Frames
180 ms (Near-Instant)
Invulnerability (I-Frames)
1.8s Phantom State
Damage Output
70% - 80% HP
Block Penetration
Chip & Penetration
Technical Breakdown: Sonic projects 10 supersonic clones encircling the adversary simultaneously, hurling explosive shurikens from every quadrant before converging in a coordinated heart-piercing thrust. At 180ms startup latency, it is one of the fastest executing finishers in the title.
Pro Execution Strategy: With negligible recovery lag, Tenfold Funeral is the supreme whiff-punishing tool. Launch it the millisecond an opponent commits to an evasive side-dash or misjudges their spacing.
RANK 08: TABLE FLIP (THE STRONGEST HERO / SAITAMA)
TIER S (GLOBAL ARENA SHATTER)
Startup Frames
500 ms (Ground Lift)
Invulnerability (I-Frames)
1.5s Ground Uproot
Damage Output
60% - 70% HP + Launch
Block Penetration
Wide Guard Break
Technical Breakdown: Saitama digs his hands into the arena foundation, hoisting a monolithic tectonic slab into the sky before flipping it down onto the combat zone. All adversaries within a 30-meter radius are hurled upward in complete disequilibrium.
Pro Execution Strategy: Table Flip serves as the ultimate neutral opener. Time the descent of airborne adversaries to land a guaranteed Serious Headbutt or Serious Punch before they regain ground control.
RANK 09: VOID SPLITTER / DRAGON FIST (SUIRYU / MARTIAL ARTIST)
TIER S (DYNAMIC GAP-CLOSER)
Invulnerability (I-Frames)
1.3s Rush State
Damage Output
65% - 75% HP
Block Penetration
Auto Guard Break
Technical Breakdown: Master martial artist Suiryu channels internal void kinesis into a rotational whirlwind kick, pulling targets into a vortex before detonating them with a downwards Dragon Fist impact. Its 20-meter forward leap provides unmatched gap-closing utility.
Pro Execution Strategy: Combine with side-dash momentum to execute an unexpected cross-up attack outside the adversary forward field of vision, guaranteeing a guard-broken combo loop.
RANK 10: ASTEROID DROP (TATSUMAKI / ESPER)
TIER S (TELEKINETIC BOMBARDMENT)
Startup Frames
400 ms (Summon Call)
Invulnerability (I-Frames)
1.4s Aerial Hover
Damage Output
70% - 80% HP
Block Penetration
True Unblockable
Technical Breakdown: Esper Tatsumaki ascends and summons an astronomical meteorite plummeting directly upon target coordinates. The blast radius encompasses an entire arena quadrant, generating concussive shockwaves that bypass standard blocking stances.
Pro Execution Strategy: Its greatest tactical asset is vertical elevation safety. Launch following a Telekinetic Repulsion to stay well beyond the reach of opposing melee retributions while the celestial body descends.
3. Comprehensive Technical Frame Data & Metric Comparison
The table below compiles verified engine-level metrics: Startup Latency (milliseconds), Invulnerability Windows (seconds), Damage Coefficients (% Max HP), Block Status classifications, and Whiff Recovery penalties:
| Move & Character |
Startup |
I-Frames |
Damage |
Block Type |
Hitbox Geometry |
Whiff Penalty |
| Serious Punch (Saitama) |
450 ms |
1.8s |
100% HP (Oneshot) |
Unblockable |
60m (Cone) |
Instant Rage Burn |
| Collapsing Star Cannon (Boros) |
600 ms |
2.2s |
100% HP (Oneshot) |
Unblockable |
80m (Linear Beam) |
1.8s Stagger |
| Final Hunt (Monster Garou) |
280 ms |
1.5s |
85% - 95% HP |
Guard Break |
15m (Lunge Grab) |
0.8s Vulnerability |
| Incineration Cannon (Genos) |
320 ms |
1.4s |
80% - 90% HP |
Guard Break |
45m (Cylinder) |
1.1s Recovery |
| True Atomic Slash (Samurai) |
240 ms |
1.6s |
75% - 85% HP |
Guard Break |
18m (Lock-on) |
0.6s Sheath |
| Maximum Beatdown (Metal Bat) |
300 ms |
Super Armor |
70% - 90% HP |
Guard Break |
12m (Radial) |
0.7s Recovery |
| Tenfold Funeral (Sonic) |
180 ms |
1.8s |
70% - 80% HP |
Guard Break |
20m (Full Sphere) |
0.4s (Minimal) |
| Table Flip (Saitama) |
500 ms |
1.5s |
60% - 70% HP |
Guard Break |
30m (Radial) |
0.9s Lift Lag |
| Void Splitter (Suiryu) |
220 ms |
1.3s |
65% - 75% HP |
Guard Break |
20m (Lunge) |
0.5s Landing |
| Asteroid Drop (Tatsumaki) |
400 ms |
1.4s |
70% - 80% HP |
Unblockable |
35m (Quadrant) |
1.0s Descent Lag |
4. 8 Visual Awakening Synergy & Combo Loadout Decks: Step-by-Step Oneshot Sequences
Explore 8 meticulously engineered competitive combo decks detailing step-by-step execution flows, resource expenditure, strengths, and mechanical counter-vulnerabilities:
COMBO DECK 01: MONSTER GAROU APEX PREDATOR FLOW
DIFFICULTY: ADVANCED
SLOT 1
3x Neutral M1 Hits
SLOT 3
Downslam Grounding
FINISHER 6
Final Hunt (All-In)
Step-by-Step Execution Protocol:
1. Initiate with 3 neutral M1 strikes to lock the target inside hitstun.
2. Animation-cancel immediately into Lethal Whirlwind Stream driving the target towards wall geometry.
3. Jump and perform an aerial Downslam grounding the target in ragdoll state.
4. As the adversary recovery begins, trigger Prey's Peril to crush defensive block attempts.
5. Connect Crushed Rock Fist launching the enemy into vertical trajectory.
6. Lock camera orientation and trigger Final Hunt during enemy descent, delivering 100% total HP extermination.
Strengths: Absolute true damage combo; denies opposing rage burst if initial M1 chain connects.
Weaknesses: Requires frame-perfect Downslam timing; missing the grounding allows opponent to side-dash escape.
COMBO DECK 02: SAITAMA SERIOUS ONESHOT DECK
DIFFICULTY: MODERATE
Step-by-Step Execution Protocol:
1. Maneuver diagonally using Side Dash to evade probing neutral attacks.
2. Slam hands downward to activate Table Flip, launching the adversary airborne.
3. Meet the falling target with Serious Headbutt delivering massive concussive damage.
4. Trigger Omnidirectional Serious Punches to lock the adversary in place for 2.0 seconds.
5. Steer the final punch trajectory into perimeter arena walls.
6. Unleash Serious Punch point-blank, concluding the engagement instantly.
Strengths: Tremendous hitbox coverage ensures high hit rates inside standard arena parameters.
Weaknesses: Completely exhausts remaining Awakening meter regardless of prior duration.
COMBO DECK 03: GENOS INFERNAL CORE FLAME FLOW
DIFFICULTY: MODERATE
SLOT 5
Core Overheat Wave
FINISHER 6
Max Incineration Cannon
Step-by-Step Execution Protocol:
1. Fire rocket thrusters via Jet Dive to close distance and shatter guard.
2. Follow up with rapid Machine Gun Blows denying evasive inputs.
3. Detonate Ignition Burst applying initial burn ticks and minor pushback.
4. Launch Death Shower homing ordnance tracking the airborne target.
5. Teleport close and vent Core Overheat shockwave for area stun.
6. Fire Maximum Output Incineration Cannon to vaporize all residual enemy health.
Strengths: Versatile range control from close-quarters rushdown to full-screen sniping.
Weaknesses: Cannon execution leaves a 1.1s stationary recovery window susceptible to third-party ambushes.
COMBO DECK 04: BOROS CELESTIAL DOMINANCE FLOW
DIFFICULTY: HIGH
SLOT 1
Meteoric Burst Dash
SLOT 2
Star Slam (Guard Break)
SLOT 5
Cosmic Beam Charge
FINISHER 6
Collapsing Star Cannon
Step-by-Step Execution Protocol:
1. Close space instantly utilizing Meteoric Burst velocity.
2. Execute Star Slam to destroy opponent guard posture.
3. Land Cosmic Rush strikes to maintain target hitstun.
4. Connect Moon Kick launching the adversary high into the stratosphere.
5. Hold stationary position during the 600ms startup charging phase while target is airborne.
6. Fire Collapsing Star Roar Cannon through the descent vector, vaporizing the opponent.
Strengths: Moon Kick sets up an unevadable finisher trajectory where opponents cannot trigger ground evasions.
Weaknesses: High energy consumption drains Awakening meter rapidly if Moon Kick misses.
COMBO DECK 05: METAL BAT INDOMITABLE CLUTCH FLOW
DIFFICULTY: CLUTCH MASTER
SLOT 1
Take Hit Ragdoll [G]
SLOT 5
Super Armor Stride
FINISHER 6
Maximum Beatdown
Step-by-Step Execution Protocol:
1. Allow health to drop to 15% - 25% then trigger [G] Ragdoll Awakening shockwave.
2. Immediately execute Home Run launching the enemy into adjacent building walls.
3. Hurl Foul Ball projectile to apply concussive disequilibrium.
4. Stomp ground with Grand Slam shattering the terrain beneath the target.
5. Advance forward leveraging Super Armor to trade through enemy counter-strikes.
6. Slam Maximum Beatdown delivering peak low-health 90% scaled execution damage.
Strengths: Highest comeback potential in the game; punishing overconfident opponents attempting to finish you.
Weaknesses: Extreme risk profile; mistiming the health threshold may result in elimination before [G] registers.
COMBO DECK 06: ATOMIC SAMURAI SUN BLADE DANCE FLOW
DIFFICULTY: HIGH
SLOT 2
Sunset Slice Break
SLOT 4
Atmospheric Cleave
SLOT 5
Magnetic Target Lock
FINISHER 6
True Atomic Slash
Step-by-Step Execution Protocol:
1. Maneuver behind the opponent back utilizing Flash Dash evasive angles.
2. Unsheathe Sunset Slice horizontally to destroy opposing guard stamina.
3. Trigger Dual Blade Dance connecting a 6-hit rapid sword sequence.
4. Launch Atmospheric Cleave driving the adversary into corner geometry.
5. Confirm lock-on reticle alignment within 15 meters.
6. Unleash True Atomic Slash atomizing the target in subatomic dimensional crosscuts.
Strengths: Supersonic sword startup and magnetic tracking ensure nearly 100% confirmation rates.
Weaknesses: Demands precise camera sensitivity management to prevent clipping past jumping opponents.
COMBO DECK 07: SONIC PHANTOM SPEED BLITZ FLOW
DIFFICULTY: MASTER MOBILITY
SLOT 2
Explosive Shuriken
FINISHER 6
Tenfold Funeral
Step-by-Step Execution Protocol:
1. Move in dynamic zigzag vectors with Flash Step to disorient opponent tracking.
2. Hurl Explosive Shurikens creating smoke screens and stagger.
3. Land Whirlwind Kick launching target airborne.
4. Trigger Twin Shadow Strike warping directly into target descent arc.
5. Confirm the target landing recovery stagger frame.
6. Trigger Tenfold Funeral instantly to tear through the entire enemy health bar.
Strengths: Unmatched agility causes extreme panic in opponents, forcing premature defensive errors.
Weaknesses: Low base health pool; getting caught in a counter-strike can prove fatal.
COMBO DECK 08: ANTI-AWAKENING STALLING & SURVIVAL PROTOCOL
TACTICAL DEFENSE
STEP 1
Aural [G] Recognition
STEP 2
45-Degree Side Dash
STEP 3
High Ground Ascent
STEP 4
Bait Whiff Staggers
COUNTER 6
Post-Rage Punish
Step-by-Step Execution Protocol:
1. Recognize opposing Awakening audio cue instantly and disengage from close melee range.
2. Move across 45-degree diagonal vectors with Side Dash to avoid linear Serious Punch or Final Hunt lunges.
3. Utilize wall ledges, light poles, and rooftop geometry to complicate opponent aiming angles.
4. Bait out high-cost AoE abilities into open air, forcing opponents into extensive whiff recovery frames.
5. Maintain distance and circle arena boundaries until the opposing rage timer fully depletes.
6. The instant the enemy reverts to base form with all cooldowns spent, engage aggressively with full combo punishment.
Strengths: Completely nullifies opposing Awakening power spike without losing health.
Weaknesses: Demands elite spatial awareness and movement discipline under immense pressure.
5. Advanced Rage Meter Management & Clutch Awakening Tactics
Holding a 100% Awakening meter does not automatically guarantee victory. The fundamental distinction between casual players and tournament champions lies in activation timing, positional awareness, and strategic exploitation of every second of the transformation.
Three Master-Class Awakening Execution Arts:
- Ragdoll Burst Awakening (Reversal from Disadvantage): The most common rookie blunder is activating Awakening from across the arena while the opponent is completely safe. Instead, hold your [G] input and activate it precisely while trapped inside an enemy combo or lying on the floor in ragdoll state. The expanding shockwave repels the attacker, terminates their combo string, and instantly shifts momentum in your favor.
- Corner Trap Confinement (Eliminating Evasive Space): Ultimate moves gain 200% efficacy when adversaries are pinned against arena boundary walls. Enclosed corners eliminate horizontal dash vectors, ensuring that wide-cone attacks like Serious Punch or cylindrical beams like Incineration Cannon register with 100% accuracy.
- Exploiting Defensive Block Reflexes: When facing an awakened adversary, players instinctually default to holding their block key [F]. Exploit this conditioned behavior by feigning an M1 approach before triggering an instant Guard Break ability. Shattering their guard stance inflicts a 20% stagger vulnerability penalty and locks them out of dash evasions for 1.5 seconds.
6. Control Bindings, FPS Unlocking And Reflex Latency Optimization
In a fast-paced fighting game like The Strongest Battlegrounds, input latency and frame stability dictate whether you can react to an opposing Ultimate startup within the critical 200ms visual window:
1. Optimal Keybind Remapping
Remap Dash [Q] and Block [F] to Mouse Side Buttons (MB4 and MB5). This keeps your WASD movement fingers uncompromised at all times, allowing instantaneous lateral directional shifts without disrupting running momentum.
2. Calibrated Mouse DPI (800 - 1200)
Configure your sensor to 800 to 1200 DPI with in-game Roblox camera sensitivity set between 0.20 and 0.35. This calibration offers the ideal balance between 180-degree defensive reflex spins and pinpoint reticle targeting stability.
3. 120+ FPS Engine Unlocking
Utilize a verified FPS unlocker to boost Roblox client refresh rates from the default 60 FPS cap up to 120 or 144 FPS. This reduces display latency from 16.6ms to below 6.9ms, giving you nearly a 10ms advantage in recognizing enemy attack windups.
7. 12 Deep Technical Frequently Asked Questions (FAQ) About TSB Ultimates
Q01: Which Awakening move inflicts the highest raw damage in TSB?
Saitama Serious Punch and Boros Collapsing Star Roar Cannon both deliver absolute 100% maximum HP damage, instantly terminating any targeted opponent regardless of their current health pool.
Q02: Can Serious Punch be blocked by holding the F key?
No. Serious Punch is classified as True Unblockable. Holding block will not mitigate any damage and will result in immediate vaporization.
Q03: How do you reliably evade Monster Garou Final Hunt?
Final Hunt travels in a direct forward line. When you witness the startup roar animation, immediately execute a 90-degree lateral Side Dash rather than backpedaling.
Q04: What exactly is Ragdoll Awakening and how is it executed?
Ragdoll Awakening involves pressing [G] while your character is knocked down or trapped inside an enemy combo. The transformation burst produces an omnidirectional knockback that interrupts the attacker and resets neutral game.
Q05: How long does the Awakening state last across different characters?
Standard Awakening lasts between 30 and 45 seconds: Saitama (35 seconds or ends instantly upon Serious Punch), Garou (40 seconds), Genos (40 seconds), Atomic Samurai (45 seconds), and Metal Bat (35 seconds).
Q06: How does Metal Bat Super Armor function during Awakening?
Super Armor grants infinite poise (No Flinch and No Knockback) during swing animations, allowing you to trade hits directly through enemy offensive strings without being staggered.
Q07: Why does pressing [G] sometimes fail to trigger Awakening?
This occurs if your rage meter has not fully reached 100%, if you are afflicted by special hard stun or silence debuffs, or during the brief recovery window of certain specific knockdowns.
Q08: Which ultimate has the fastest startup latency in the rankings?
Sonic Tenfold Funeral boasts the fastest startup at an astonishing 180ms, followed closely by Suiryu (220ms) and Atomic Samurai (240ms).
Q09: Should you fire your Ultimate finisher immediately upon awakening?
No. You should leverage your enhanced basic abilities to pressure the opponent and deplete their dash charges. Once the enemy is cornered and fatigued, unleash the Ultimate finisher for a guaranteed kill.
Q10: What is the most effective defensive protocol against an awakened opponent?
Adopt the Anti-Awakening protocol: maintain continuous diagonal movement, scale elevated geometry, bait out whiffed abilities, and stall for 35 to 40 seconds until the enemy rage bar expires.
Q11: Can Tatsumaki Asteroid Drop be obstructed by roof structures?
Yes. The celestial body detonates upon impact with the first solid collision mesh. Hiding beneath heavy structural ceilings absorbs the majority of downward concussive blast damage.
Q12: Which character possesses the greatest low-health comeback potential?
Metal Bat (Brutal Demon) is the indisputable clutch king: lower health pools drastically amplify his Awakening damage scaling, turning Maximum Beatdown into a devastating 90% execution strike when below 20% HP.
8. Server Replication Tick Rates, Hitbox Registration & Ping Compensation in TSB
Operating at the pinnacle of competitive ranked duels in The Strongest Battlegrounds requires an acute understanding of Roblox client-server networking physics. While individual client displays render at 60 to 144 frames per second, server-side collision validation polls at discrete 60Hz tick rates. In cross-regional tournament matches where network latency regularly fluctuates between 80ms and 150ms, micro-delays drastically alter hit registration and invulnerability windows:
The 0.15-Second Raycast Validation Buffer
When releasing high-velocity projectile finishers such as Serious Punch or Collapsing Star Roar Cannon, client raycasts project instantaneously across the screen. However, the host server validates whether the adversary avatar was legally inside the collision cylinder 150ms prior. If your ping exceeds 120ms, an opponent who appears within your crosshairs may register as already having dashed clear on the authoritative server timeline.
Ragdoll Reversal Desynchronization
Executing a Ragdoll Burst Awakening via key G sends an urgent priority packet requesting transformation status. Under high latency, a fraction-of-a-second delay can allow the opponent next combo strike to register before the transformation invulnerability frame activates, resulting in interrupted bursts. Top tournament players buffer the G key input prior to touching the floor to preemptively defeat network packet latency.
Spatial Wall Splat Hitbox Clipping
Knocking opponents into building surfaces using Lethal Whirlwind Stream or Table Flip creates secondary wall-splat collision checks. On 60Hz servers, players hugging corners experience slight positional rubberbanding. Recognizing this spatial quirk enables competitive fighters to time their follow-up grab abilities with 100% confirmation reliability.
9. Competitive Tournament Rulesets & Awakening Matchup Dynamics
In organized competitive circuits and community-sanctioned championship brackets, Awakening usage is strictly regulated to preserve tactical integrity. Familiarizing yourself with tournament rule adjustments is vital for competitive readiness:
Standard Tournament Awakening Protocols:
- The Single Awakening Limit: In best-of-three 1v1 tournament formats, contestants are permitted exactly one Awakening activation across the entire match series. Wasting an Awakening during Game 1 leaves you at a severe tactical disadvantage in subsequent rounds.
- Instant-Kill Move Confirmations: Abilities that inflict 100% true damage (Serious Punch and Collapsing Star Roar Cannon) are subject to mandatory neutral reset rules in certain community ladders if triggered during a third-party interference incident.
- Matchup Counter-Picks: Monster Garou serves as the premier anti-Saitama counter due to his hyper-fast 280ms Final Hunt grab which can punish Saitama during the prolonged windup of Table Flip or Serious Headbutt. Conversely, Genos dominates Metal Bat by maintaining long-range bombardment that keeps the Berserker outside of melee Super Armor trade range.
10. Advanced Micro-Mechanics: Animation Canceling & Dash Buffering
Elevating your competitive execution from intermediate to grandmaster status demands the mastery of frame-level micro-techniques that bypass default character recovery states:
Whiff-Recovery Dash Buffering
If an Awakening strike fails to connect, do not wait for the recovery animation to finish naturally. Inputting a directional side-dash command during the final 3 frames of the recovery state automatically buffers an immediate evasive slide, cutting your vulnerable stagger duration by up to 35%.
Camera Slide-Turning During Beam Casts
During the initial startup phase of Genos Maximum Incineration Cannon or Boros Collapsing Star Roar Cannon, rapidly shifting your camera angle allows you to adjust the trajectory of the beam by up to 15 degrees right before the hitboxes deploy, catching opponents attempting to side-dash out of the blast path.
Conclusion: The Competitive Mindset of Arena Dominators
The Awakening Moves in The Strongest Battlegrounds represent the ultimate barometer of fighting game mastery. A haphazard Serious Punch merely yields disappointment when an opponent easily dashes aside; however, a calculated Ragdoll Burst followed by a frame-tight corner containment combo transforms you into a dominant force on any competitive server.
Hone your startup timing, command your rage resource with iron discipline, and rise to the summit as the undisputed champion of The Strongest Battlegrounds!