The Strongest Battlegrounds Combo Guide: Side-Dash & One-Shot Tech
Seamou Editorial
Updated: 30/10/2026
16 min read
The arena of The Strongest Battlegrounds (TSB) in Roblox is where close-quarters combat physics is pushed to its absolute zenith. Victory is not decided merely by flashy abilities or Awakening ultimate states; the true separation between an amateur and a 1v1 Ranked master lies in frame control (Hitstun Frames), exploiting the blind spots of the 180-degree block cone, and executing inescapable True One-Shot combos. Mastering Side-Dash flank maneuvers, M1 Resets, and the signature combat strings of Saitama and Garou will transform you into a feared duelist across competitive lobbies.
1. Hitstun Frame Data & Advanced Movement Fundamentals
TSB combat physics is strictly dictated by recovery animations and momentum constraints:
M1 Basic Attack String: Every character features a 4-hit M1 attack string. The first 3 hits inflict light hitstun (0.2s), holding the opponent stationary. The 4th M1 hit delivers a heavy Knockback or Downslam, throwing the enemy away and ending the string.
M1 Reset (Animation Frame Cancel): To extend a string beyond the 4-hit limit, stop precisely on the 3rd M1, then instantly buffer a command-grab skill or Side-Dash to restart a fresh M1 string. This technique extends your sequence to 7-10 hits, draining 100% of the target's HP before they can touch the ground.
Side-Dash Superiority (A/D + Q): While Front Dash and Back Dash carry a 5-second cooldown, Side-Dash requires only 2 seconds to recharge. It serves as the ultimate positioning tool to evade direct attacks, close distance, and bypass guard angles.
180-Degree Block Cone Limitation: Blocking (F) only shields within a 180-degree forward cone. Performing a Side-Dash into the opponent's flank or back allows your M1 strikes to bypass their guard completely and lock them into a combo.
Ragdoll Cancel (Air/Ground Tech Recovery): When launched into a ragdoll tumble, press Q the exact millisecond your character contacts the ground to execute an instant recovery roll, cancelling passive stun.
TSB COMPETITIVE 1V1 META
Saitama & Garou Movement Tech & One-Shot Combo Loadout
Step 1: Flank using Side-Dash A/D+Q to bypass the front 180-degree block cone→Step 2: Land exactly 3x M1 strikes and cancel the animation frame with Shove or Hunter's Grasp→Step 3: String another 3x M1 hits into an aerial jump Downslam to knock the target down→Step 4: Execute Consecutive Punches or Lethal Whirlwind to wipe out 100% of their HP
Key Tactical Strengths
Completely demolishes passive block-turtling, prevents enemies from executing Ragdoll Cancels, and deletes an entire health bar in a single flawless string.
QUẢNG CÁO NỘI BỘ • DỊCH VỤ SEAMOU STUDIO
BÁCH KHOA TOÀN THƯ TRÒ CHƠI
Kho Mã Quà Tặng & Bách Khoa Trò Chơi Chính Hãng
Tra cứu mã đổi thưởng mới nhất, bảng xếp hạng phân bậc sức mạnh và cẩm nang chiêu thức chi tiết hoàn toàn miễn phí.
Requires strict input discipline; accidentally pressing the 4th M1 knocks the opponent away, granting them an immediate reset and counter-attack window.
2. Skill Matrix & Benchmark: Saitama vs. Garou
These two iconic fighters represent opposing philosophies: Saitama commands raw explosive burst, while Garou acts as an oppressive rushdown machine with life-steal sustain:
Character & Skill
Cooldown
Block Property
Est. Damage
Tactical Crowd Control
Combo Role
Saitama: Normal Punch Key 1
13s
Block Break
18.5% HP
Shatters guards completely, knocks enemies back on hit.
Guard break, finisher
Saitama: Consecutive Punches Key 2
15s
Blockable
32.0% HP
Unleashes dozens of rapid punches locking the target for 1.8s.
Mid-combo burst DPS
Saitama: Shove Key 3
10s
Block Break
12.0% HP
Instant shoulder bash, stuns the target in place without knockback.
Supreme M1 Reset tool
Saitama: Uppercut Key 4
14s
Blockable
15.0% HP
Upward strike launching the target into the air for aerial follow-ups.
Aerial launcher
Garou: Flowing Water Key 1
12s
Blockable
20.0% HP
Martial arts barrage trapping the target in continuous hitstun.
Close-range combo glue
Garou: Lethal Whirlwind Stream Key 2
16s
Block Break
28.0% HP
Spins into a wind vortex that shreds guards and launches targets high.
Guard break, combo ender
Garou: Hunter's Grasp Key 3
13s
Block Bypass
14.0% HP
Rushes forward to slam the enemy into the floor, completely bypassing Block.
Anti-turtling grab
Garou: Prey's Peril Key 4
18s
Counter
25.0% HP
Parry stance for 1.2s. If struck, teleports behind the enemy for a counter.
Punishes M1 mashers
3. Step-by-Step Competitive One-Shot Combos
Combo 1: Saitama 100% True One-Shot Chain
Step 1 (Opener): Side-Dash behind the opponent → Land exactly 3x M1 hits (Never hit the 4th M1).
Step 2 (M1 Reset 1): Immediately buffer Shove (Key 3). The shoulder tackle stuns them in place without knockback.
Step 3 (Ground Extension): Land another 3x M1 hits in quick succession.
Step 4 (Aerial Downslam): Jump (Space) and trigger the 4th M1 in mid-air to execute a Downslam, crashing the enemy face-first into the floor.
Step 5 (OTG Pickup Burst): The moment they strike the floor, activate Consecutive Punches (Key 2). The multi-hit pulls them upright and inflicts the full 32% damage.
Step 6 (Finishing Blow): Front Dash and close the combo with Normal Punch (Key 1) to delete any remaining health.
Combo 2: Garou Inhumane Life-Steal Flow
Step 1 (Guard Bypass): Cast Hunter's Grasp (Key 3) to snatch blocking opponents and slam them onto the arena ground.
Step 2 (Tempo Strike): Dash up as they rise → Land 3x M1 hits.
Step 3 (Hitstun Lock): Activate Flowing Water (Key 1) to hold them inside the martial dance.
Step 4 (Side-Dash Flank): On the final frame of Flowing Water, input A + Q to Side-Dash left and chain another 3x M1 hits.
Step 5 (Lethal Whirlwind Finisher): Activate Lethal Whirlwind Stream (Key 2) to launch them skyward, triggering your passive heal and eliminating the target.
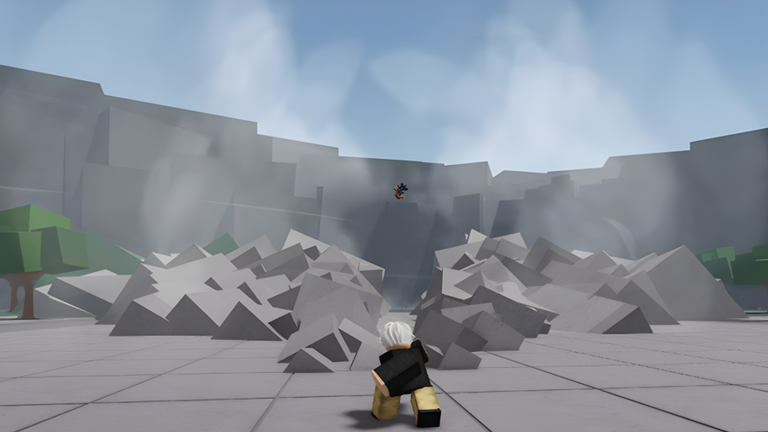
SAITAMA: SERIOUS MODEAwakening: God-Tier
Unlocks 4 cataclysmic abilities: Serious Punch (Instant map-wide 100% HP kill), Serious Table Flip (Launches the entire arena floor), Omnidirectional Serious Punch, and Death Counter.
Tactical Role: Total field supremacy that leaves zero room for opponent comebacks.
GAROU: HERO HUNTER AWAKENINGAwakening: Demon-Tier
Transforms into a monstrous form, granting +200% movement speed. Unlocks the supreme Water Stream Rock Smashing Fist and restores 50% missing HP on kill.
Tactical Role: Relentless snowballing juggernaut in chaotic free-for-all lobbies.
4. High-Tier Counter-Play & Baits
Cracking Block Turtles: Never blindly swing M1 into an opponent's front guard. Use Block Break abilities (Shove, Lethal Whirlwind) or Block Bypass grabs (Hunter's Grasp) to open them up.
Whiff Punishing: When an opponent misses an M1, their character experiences 0.2s of recovery endlag. Stand half a step outside their reach, wait for the whiff, then Side-Dash inward to begin your string.
Baiting Counters: When facing Garou or Atomic Samurai, never attack if they suddenly freeze into an idle pose (Prey's Peril is active). Pause for 1.5s until their guard drops, then unleash your full combo.
5. Critical Mistakes to Eliminate in Ranked Duels
Autopilot 4th M1: Hitting the 4th M1 knocks the enemy away and lets them Ragdoll Cancel back to safety. Strictly drill hitting only 3 M1s.
Front Dash Spamming: Front Dashes travel in a straight predictable line, easily caught by Perfect Blocks. Always approach via diagonal Side-Dashes.
Ignoring the Awakening Gauge: Check your opponent's ultimate meter before initiating a string. If full, they can pop Serious Mode to interrupt your combo and counter-kill you instantly.
6. Technical Frequently Asked Questions (FAQ)
How do I execute a smooth Side-Dash around an opponent's back?
Press A (or D) + Q while simultaneously flicking your mouse 45 degrees in the dash direction. This keeps your crosshair aimed at their neck the exact instant the dash animation terminates.
How can I break out of an infinite combo if caught?
Your primary option is the Evasive skill (G). If on cooldown, time your input to press Q the precise instant your character touches the ground following a Downslam to execute an immediate Ragdoll Cancel roll.
What is the fastest way to build Awakening meter in combat?
The ultimate gauge charges from landing damage and surges significantly when taking damage (comeback mechanic). Maintaining extended M1 combo strings and finishing with special moves fills the gauge within 2-3 engagements.
DỊCH VỤ CHÍNH THỐNG • CÔNG TY TNHH CÔNG NGHỆ VÀ KỸ THUẬT SEAMOU
ĐẶC QUYỀN HỆ SINH THÁI SEAMOU
Nhận Quà Tặng & Đặc Quyền The Strongest Battlegrounds Tại Hệ Sinh Thái Seamou
Khám phá ngay danh sách mã đổi thưởng mới nhất, bảng thông số vật phẩm và cộng đồng The Strongest Battlegrounds trực thuộc hệ sinh thái Seamou Studio.
All gameplay screenshots, game assets, logos, and technical figures referenced in this article are the copyrighted property of their respective creators, publishers, and community encyclopedias. Seamou Studio displays and references these media assets in accordance with the Fair Use doctrine for informational purposes, tactical analysis, commentary, and player onboarding guides. All trademarks and registered trademarks belong to their respective holders.


 Saitama