
1. The Freeform Melee Revolution in The Strongest Battlegrounds: Pinnacle of Roblox Arena Combat
Across the expansive landscape of multiplayer action and fighting titles on the Roblox platform, The Strongest Battlegrounds (TSB), masterminded by development studio Yielding Arts, stands as an unassailable titan of competitive combat, commanding hundreds of thousands of daily duelists worldwide. Directly inspired by the legendary manga and anime universe of One Punch Man, the game goes far beyond merely replicating fan-favorite icons like Saitama, Garou, Genos, and Atomic Samurai; it establishes a meticulously tuned, physics-based freeform melee combat engine boasting a skill ceiling that rivals traditional commercial fighting franchises.
Unlike standard role-playing experiences that rely upon artificial stat inflation, automatic lock-on targeting, or passive turn-based ability rotations, The Strongest Battlegrounds is a ruthless arena governed by millisecond-tier visual reaction times, directional trajectory prediction, precise M1 normal attack cancel timings, and frame data discipline. A novice entering this unforgiving arena without mastering fundamental collision dynamics and recovery mechanics will quickly find themselves trapped in suffocating stun-lock loops, bounced off concrete skyscrapers, and eliminated from the server in sheer exasperation.
To equip the international competitive fighting community with an exhaustive, mathematically grounded, and authoritative tactical manual, Seamou Studio presents the Definitive Beginner and Intermediate Compendium for The Strongest Battlegrounds: an exhaustive breakdown covering micro-mechanics, frame data profiles, character tier rankings, 8 devastating true combo routes, and 20 crucial technical questions answered in granular detail.
1. Normal Attack Strings & M1 Cancel Mastery
The baseline M1 string consists of 4 strikes. The initial 3 hits inflict micro-stun to anchor opponents in place, whereas the 4th hit pushes the target away into ragdoll state.
Canceling after the 3rd hit directly into a tracking stun ability forms the supreme foundation for inescapable true combo loops.
2. Blocking, Block Breaks & Unblockable Strikes
Holding F raises an energy shield negating all frontal M1 damage. However, dedicated Block Breakers shatter the guard and trigger a severe 1.5s vulnerability stun.
Unblockable ultimate attacks bypass defensive shields entirely, mandating rapid lateral side dashes to escape lethal blast cones.
3. Ultimate Awakening Transformation Dynamics
The crimson Ultimate Bar charges through dishing out and absorbing damage. Pressing G activates a cinematic transformation granting temporary invulnerability.
From Saitama's world-clearing Serious Punch to Garou's Monster Form, awakening represents the definitive turning point in any competitive match.
Technical Baseline Comparison of Core Fighters in The Strongest Battlegrounds
| Character & Title | Combat Archetype | Average True Combo Output | Core Block Breaker | Awakening Form |
|---|---|---|---|---|
| Saitama (The Strongest Hero) |
Pure brawler, high burst damage, beginner-friendly | 4 - 6 hits (65% - 85% HP) |  ShoveMặc Định: Miễn PhíDùng tay đẩy mạnh phá vỡ trạng thái đỡ đòn (Block Break) của đối thủ.Click to View Full Wiki Profile → |
Serious Mode |
| Garou (Hero Hunter) |
Martial arts virtuoso, fluid counters, longest combo chains | 8 - 12 hits (80% - 100% HP) | Flowing WaterMặc Định: Miễn PhíThế võ Nước Chảy Đá Mòn tự động phản đòn và gạt bay mọi đòn đánh…Click to View Full Wiki Profile → |
Monster Form |
| Genos (Destructive Cyborg)Miễn Phí: 0 KillsTướng Genos trong The Strongest Battlegrounds Roblox với bộ chiêu thức One-Shot, phản đòn Side-Dash và…Click to View Full Wiki Profile → |
Mid-range hybrid, jet dashes, wide AoE incineration | 5 - 7 hits (70% - 90% HP) | IncinerateMặc Định: Miễn PhíKích hoạt lõi nhiệt giải phóng chùm năng lượng thiêu rụi đối thủ từ cự ly…Click to View Full Wiki Profile → |
Maximum Output Core Mode |
| Atomic Samurai (Blade Master)Miễn Phí: 0 KillsTướng Atomic Samurai trong The Strongest Battlegrounds Roblox với bộ chiêu thức One-Shot, phản đòn Side-Dash…Click to View Full Wiki Profile → |
High-speed swordsman, aerial blade juggles | 6 - 9 hits (75% - 95% HP) | Atmos CleaveMặc Định: Miễn PhíTuốt kiếm chém ra lưỡi đao khí nguyên tử bay xa xé rách không gian.Click to View Full Wiki Profile → |
Atomic Slash Mode |
| Tatsumaki (Wild Psychic) | Long-range telekinesis, aerial zoning and stone throws | 5 - 8 hits (70% - 85% HP) | Gravitational Crush | Tornado Tempest |
| Sonic (Deadly Ninja) | Hypersonic assassin, smoke decoys, explosive shurikens | 7 - 10 hits (65% - 85% HP) | Flash Strike | Ten Shadows Burial |
2. Deep Melee Mechanics: Frame Data, Dash Cancels, Downslams & Tech Roll Recovery
Transcending instinctual button-mashing requires internalizing the mathematical rules and collision physics governing every arena clash:
1. M1 Cancel Mechanics & Downslam vs Uppercut Selection
Every standard M1 strike carries a startup delay of 8 to 12 frames and imposes approximately 0.45s of hitstun upon the victim. If you casually execute the 4th hit while standing flat on the floor, the standard pushback kick activates, launching your opponent 20 meters away and immediately triggering their ground ragdoll recovery.
Competitive practitioners substitute the 4th hit with two specialized aerial finishers:
- The Downslam (Space Jump + Air M1): Immediately following the 3rd M1, jump into the air and trigger your aerial normal attack. Your avatar executes a downwards overhead smash, pinning the opponent directly onto the concrete floor at your feet without pushback, allowing seamless transition into grounded stun skills.
- The Uppercut (Simultaneous Space + Left Click): Launches the opponent vertically into the air for 1.2 seconds. While airborne, the victim cannot activate ground-based tech rolls, allowing you to chase with an aerial dash for extended air combos or wait below to catch them as they descend.
2. Ragdoll Recovery Physics (The Tech Roll)
When blasted to the pavement, characters enter a limp ragdoll state lasting 2.0 full seconds. Left unmanaged, an aggressive opponent will casually stroll over, set up their optimal positioning, and punish you the instant you slowly stand up.
By tapping Q the precise moment your body strikes the ground (or during the initial 0.5s recovery window), your avatar performs a rapid evasive somersault known as the Tech Roll. This emergency evasion carries a 15-second cooldown and grants 0.35 seconds of absolute invulnerability frames (I-Frames).
Never waste your Tech Roll when an opponent is far away; hoard this vital defensive resource to break out of lethal 100% combo loops when cornered against urban walls.
3. Lateral Side Dash (Arc Dash) & Guard Bypass Tech
Holding the F key projects a 180-degree frontal defensive arc. Any attack connecting outside this frontal cone—striking the model at 90-degree lateral flanks or square in the back—inflicts 100% raw damage and immediately crumples the defender's guard.
Executing an Arc Side Dash (holding A or D while pressing Q) curves your avatar rapidly around the opponent's periphery, positioning you squarely behind their shoulder just as their forward strike initiates. Mastering this lateral slip is the defining benchmark that separates casual arena brawlers from elite 1v1 duelists.
3. Visual Tier List Matrix Board: Character Meta for 1v1 Duels & Free-For-All Arenas
This competitive hierarchy evaluates each champion based on 1v1 duel dominance, true combo consistency, counter-attack versatility, and the raw destructive ceiling of their Ultimate Awakening:
Flawless combatants equipped with oppressive close-range tools, lethal touch-of-death combo potential, and devastating awakening states.
Fighters commanding superior spatial zoning, formidable mid-range chip damage, and brutal punishment capabilities.
Genos - Destructive CyborgMiễn Phí: 0 KillsTướng Genos trong The Strongest Battlegrounds Roblox với bộ chiêu thức One-Shot, phản đòn Side-Dash và…Click to View Full Wiki Profile →Atomic Samurai - Blade MasterMiễn Phí: 0 KillsTướng Atomic Samurai trong The Strongest Battlegrounds Roblox với bộ chiêu thức One-Shot, phản đòn Side-Dash…Click to View Full Wiki Profile →Masters of evasion and distance management capable of kiting aggressive opponents and disrupting dense team skirmishes.
Resilient gladiators whose offensive potency accelerates as their health depletes, thriving in chaotic multi-target melees.
4. Comprehensive Blueprint: 8 Standard Combat Decks & True Combo Routes
A true combo represents a string of inputs during which the opponent cannot raise their defensive guard (F) or execute an evasive dash (Q) if your execution remains frame-tight:
Route: M1 x 3 + Downslam + Consecutive PunchesMặc Định: Miễn PhíTung ra hàng trăm cú đấm siêu tốc gây sát thương liên tục và khóa cứng…Click to View Full Wiki Profile → + Front Dash + M1 x 3 + ShoveMặc Định: Miễn PhíDùng tay đẩy mạnh phá vỡ trạng thái đỡ đòn (Block Break) của đối thủ.Click to View Full Wiki Profile →
- Step 2: Jump (Space) and press Left Click mid-air to execute an overhead Downslam.
- Step 3: As the victim hits the floor, immediately activate
Consecutive PunchesMặc Định: Miễn PhíTung ra hàng trăm cú đấm siêu tốc gây sát thương liên tục và khóa cứng…Click to View Full Wiki Profile →.- Step 4: Dash forward (W + Q) into another 3 M1 hits.
- Step 5: Finish the sequence with
ShoveMặc Định: Miễn PhíDùng tay đẩy mạnh phá vỡ trạng thái đỡ đòn (Block Break) của đối thủ.Click to View Full Wiki Profile → to cause massive wall-bounce damage.
- Wall bounces amplify subsequent skill stun durations by 30%.
Route: Flowing WaterMặc Định: Miễn PhíThế võ Nước Chảy Đá Mòn tự động phản đòn và gạt bay mọi đòn đánh…Click to View Full Wiki Profile → + M1 x 3 + Hunter's GraspMặc Định: Miễn PhíLướt tới túm chặt lấy mục tiêu và đập mạnh xuống mặt đất.Click to View Full Wiki Profile → + Downslam + M1 x 3 + Whirlwind StreamMặc Định: Miễn PhíKết hợp hai dòng võ học tạo thành lốc xoáy chém rách đối phương.Click to View Full Wiki Profile →
Flowing WaterMặc Định: Miễn PhíThế võ Nước Chảy Đá Mòn tự động phản đòn và gạt bay mọi đòn đánh…Click to View Full Wiki Profile →.- Step 2: String 3 M1 strikes into
Hunter's GraspMặc Định: Miễn PhíLướt tới túm chặt lấy mục tiêu và đập mạnh xuống mặt đất.Click to View Full Wiki Profile → to slam their neck onto the concrete.- Step 3: Execute an immediate jump Downslam during their recovery frames.
- Step 4: Follow with 3 M1 hits into
Whirlwind StreamMặc Định: Miễn PhíKết hợp hai dòng võ học tạo thành lốc xoáy chém rách đối phương.Click to View Full Wiki Profile → launching the target skyward.
- Pivot the Hunter's Grasp throw toward nearby structural walls for extra bounce hitstun.
Route: Jet Dash + M1 x 3 + Machine Gun BlowsMặc Định: Miễn PhíGenos xả liên hồi hàng trăm cú đấm máy móc gây sát thương diện rộng phía…Click to View Full Wiki Profile → + Uppercut + Incinerate Air BurstMặc Định: Miễn PhíKích hoạt lõi nhiệt giải phóng chùm năng lượng thiêu rụi đối thủ từ cự ly…Click to View Full Wiki Profile →
- Step 2: Land 3 M1 strikes into
Machine Gun BlowsMặc Định: Miễn PhíGenos xả liên hồi hàng trăm cú đấm máy móc gây sát thương diện rộng phía…Click to View Full Wiki Profile →.- Step 3: Launch with an Uppercut into mid-air.
- Step 4: Fire
IncinerateMặc Định: Miễn PhíKích hoạt lõi nhiệt giải phóng chùm năng lượng thiêu rụi đối thủ từ cự ly…Click to View Full Wiki Profile → directly beneath their falling frame.
- Blitz Shot can be deployed at long range to punish charging brawlers.
Route: Atmos CleaveMặc Định: Miễn PhíTuốt kiếm chém ra lưỡi đao khí nguyên tử bay xa xé rách không gian.Click to View Full Wiki Profile → + M1 x 3 + Pin CushionMặc Định: Miễn PhíHàng ngàn nhát đâm kiếm xuất hiện đồng thời trong một phần mười giây.Click to View Full Wiki Profile → + Air Dash + Downslam + Quick Slice
Atmos CleaveMặc Định: Miễn PhíTuốt kiếm chém ra lưỡi đao khí nguyên tử bay xa xé rách không gian.Click to View Full Wiki Profile → from 15 meters to shatter forward shields.- Step 2: Dash in for 3 sword slashes into
Pin CushionMặc Định: Miễn PhíHàng ngàn nhát đâm kiếm xuất hiện đồng thời trong một phần mười giây.Click to View Full Wiki Profile →.- Step 3: Aerial dash to overhead angle and Downslam their body into pavement.
- Step 4: Sheathe the blade and finish with an instant Quick Slice draw.
- Use this reach discrepancy to trade strikes safely against incoming Saitama players.
Route: Telekinetic Lift + Stone Throw + M1 x 3 + Downslam + Gravitational Compression
- Step 2: Hurl a massive concrete boulder to crush their airborne guard.
- Step 3: Float downward to connect 3 telekinetic M1 slaps.
- Step 4: Slam them down with Gravitational Compression shockwaves.
- Use psychic repulsion bursts if rushed by close-range brawlers.
Route: Explosive Shuriken + Flash Strike + M1 x 3 + Downslam + Shadow Clone Blitz
- Step 2: Use Flash Strike to dash straight through the opponent to their back.
- Step 3: Connect 3 M1 hits and Downslam them to the floor.
- Step 4: Summon Shadow Clones to strike five times before vanishing into smoke.
- Always disengage after executing a combo to wait for cooldowns before re-entering.
Route: Foul Ball + M1 x 3 + Downslam + Home Run + Fighting Spirit Rage Slam
- Step 2: Land 3 heavy bat M1 strikes.
- Step 3: Downslam into Home Run, launching the victim into structural walls.
- Step 4: Leap into an overhead Rage Slam to shatter the pavement.
- Damage output escalates by up to +40% when operating under 30% health.
Route: Void Fist Dash + M1 x 3 + Uppercut + Air Kick + Void Tremor Ground Pound
- Step 2: String 3 M1 punches into an immediate Uppercut sky launcher.
- Step 3: Jump into the air and connect an Air Kick axe slam.
- Step 4: Stomp the concrete floor with Void Tremor to finish.
- Exploit fluid slide mechanics to evade straight projectile blasts.
5. Comprehensive Masterclass: 20 Crucial Technical FAQs Answered
Below are 20 foundational technical inquiries distilled from thousands of high-level competitive duels, resolving every subtle nuance of arena physics:
Question 1: How do you execute a flawless M1 Cancel consistently?
M1 Cancels require clicking Left Mouse Button exactly 3 times in rhythm, strictly avoiding a 4th input.
The instant the 3rd punch registers on the opponent's hurtbox, activate a special skill like Saitama's Skill 2 or Garou's Skill 2.
This cancels the natural recovery animation and immediately flows into the skill's stun state.
Question 2: What tactical differences distinguish a Downslam from an Uppercut?
A Downslam pins the opponent motionless onto the ground directly beneath your feet, perfect for sweeping AoE skills.
An Uppercut launches the target into the air, preventing them from activating ground-based Tech Rolls.
Deploy Uppercuts when your opponent has their Tech Roll off cooldown to deprive them of evasion opportunities.
Question 3: How can a player escape being trapped in an infinite wall-bounce combo?
Wall bounces increase incoming stun duration by 30%, making corner traps exceptionally hazardous.
Survival relies on timing your Q key the instant your back hits the ground to trigger an outward diagonal Tech Roll.
During the 0.35s I-Frame window, immediately raise your F shield or trigger an evasive side dash.
Question 4: What mechanical distinction separates Block Breaks from Unblockables?
A Block Break (like Saitama's Shove) shatters an active F shield, inflicting a severe 1.5s stun. However, if unblocked, it inflicts standard damage without shield break stun.
An Unblockable (like Serious Punch) disregards shields entirely, dealing full damage regardless of whether F is held.
When anticipating a Block Break, release F and dash laterally rather than attempting to tank the hit.
Question 5: What is the fastest method to charge the Ultimate Awakening Bar?
The Ultimate Bar charges from dealing damage (roughly 35% per full combo) and absorbing incoming strikes (roughly 25% for half HP lost).
To accelerate meter gains: Engage in central plaza skirmishes and deploy wide AoE skills like Incinerate or Consecutive Punches.
Successfully parrying attacks with the F shield also contributes minor meter increments.
Question 6: Can the Awakening transformation cutscene be interrupted by attacks?
No. During the G key awakening animation sequence, your avatar is granted absolute invulnerability.
Incoming attacks during this window deal zero damage and frequently rebound off your character.
Expert duelists utilize this invulnerability window to activate awakenings defensively when pushed to critical health.
Question 7: How should you punish an opponent holding their F shield passively?
Never punch directly into an active guard with normal M1s, as you will suffer deflect recoil.
Tactic A: Deploy dedicated block breaking skills like Saitama's Shove to shatter their guard into a 1.5s stun.
Tactic B: Execute an Arc Side Dash to slip behind their shoulder and start an M1 string from their blind spot.
Question 8: How severely does network latency (Ping) impact combo execution?
The Strongest Battlegrounds is acutely sensitive to latency; optimal play requires ping under 80ms.
Above 150ms, the 3rd M1 hitstun suffers delay, allowing opponents to raise shields before your cancel skill connects.
Under high ping conditions, prioritize wide-area characters like Genos or Tatsumaki over frame-tight fighters like Garou.
Question 9: How is the Front Dash Cancel tech performed properly?
A standard W + Q forward dash contains recovery deceleration frames at the end of its travel distance.
By clicking Left Mouse Button mid-dash, your avatar immediately cancels the dash into an outstretched punch.
This catches opponents off-guard before they register that you have bridged the distance.
Question 10: How can you evade an awakened Saitama's Serious Punch?
When an awakened Saitama winds up Serious Punch, dramatic screen shake and sonic rumbles trigger server-wide.
Never attempt to back away linearly, as the blast corridor extends across the entire map.
The sole survival technique: Dash immediately to the lateral sides or leap onto skyscraper rooftops to clear the blast vector.
Question 11: How do you counter or bait Garou's Prey's Peril parry stance?
When Garou assumes Prey's Peril, his character ducks slightly with subtle kinetic aura wisps surrounding his hands.
Attacking directly with physical M1s or targeted skills triggers an instantaneous neck-grab counter.
Bait the counter: Pause for 1.5s until his stance naturally expires, or interrupt him from distance using Sonic's shurikens.
Question 12: Which fighter is best suited for beginners entering the game?
Saitama (The Strongest Hero) is universally regarded as the premier starting character.
His hitboxes are clean, ability trajectories are intuitive, and combo loops do not require complex camera angle pivots.
Once comfortable with spacing and cancel rhythms, transition to Garou or Atomic Samurai to explore higher skill ceilings.
Question 13: Where is the best place to practice combos without third-party interference?
Head to the perimeter of the urban arena where stationary Practice Dummies are positioned.
Here you can rehearse M1 cancel timings, downslam landings, and true combo chains without interruption.
Alternatively, create a free private VIP server to spar with friends in dedicated 1v1 sets.
Question 14: Why do 4th M1 strikes occasionally whiff on uneven ground?
This occurs due to vertical hurtbox alignment on sloped surfaces.
Fighting across staircases, building lips, or rubble hills causes the 4th hit's horizontal hitbox to sail over crouching targets.
Always guide engagements toward level asphalt in central avenues to guarantee 100% strike registration.
Question 15: How can building destruction physics be utilized tactically?
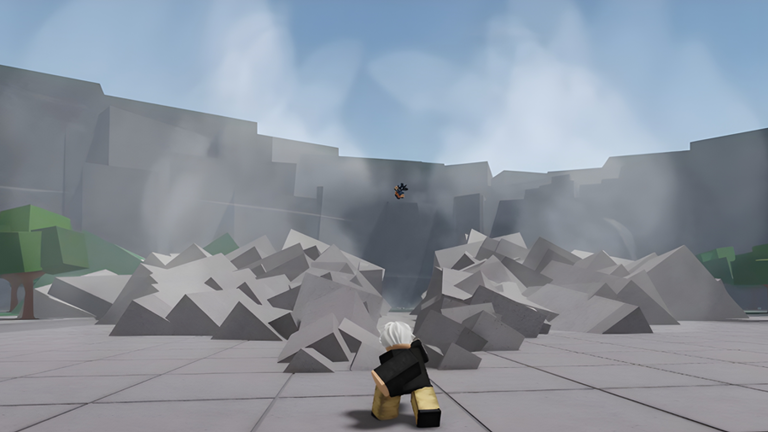
TSB's destructible environment is an active tactical asset rather than mere visual spectacle.
Collapsing skyscrapers create debris dust clouds that obscure incoming dash angles.
Tatsumaki players can weaponize concrete rubble directly, converting urban destruction into unlimited ranged projectiles.
Question 16: How does the hidden Revenge Meter mechanic function against teamers?
When attacked by two or more adversaries simultaneously, the game's anti-teaming Revenge Meter activates.
Your Awakening meter charges at triple speed, and Tech Roll cooldowns are cut in half.
Maintain defensive composure until your meter peaks, then trigger Awakening to annihilate both attackers at once.
Question 17: Why is Shift Lock camera control strictly mandatory for competitive dueling?
Shift Lock binds your character's forward torso directly to crosshair orientation.
Without Shift Lock, your character must physically turn before striking, introducing fatal delay frames.
Enabling Shift Lock guarantees that your M1 punches track mobile opponents with surgical accuracy.
Question 18: Which abilities feature the shortest cooldowns in the game?
Saitama's Normal Punch and Garou's Hunter's Grasp possess some of the briefest cooldowns in TSB (approximately 8 to 10 seconds).
These two foundational skills serve as primary combo starters and finishers across every duel.
Mastering their cooldown rhythms dictates pacing control in over 70% of arena clashes.
Question 19: Can a player activate a Counter stance while taking M1 damage?
No, provided the attacker executes their M1 string with true frame continuity.
The micro-stun lock of M1s prevents defensive skill inputs completely.
Counters can only be triggered if the attacker mistimes their cancel or whiffs a strike.
Question 20: What is the cardinal law of champion duelists in The Strongest Battlegrounds?
The unbreakable creed of elite fighters: "Maintain Guard Discipline, Master M1 Cancel Windows, Hoard Evasive Rolls, and Punish Overextensions Mercilessly."
Never attack impulsively into an unread guard. Patiently observe, bait defensive commitments, and strike the instant an opponent whiffs an ability.
When you command your own composure and spacing, no challenger in the arena can stand before you!
Question 21: How do high ping latency spikes (100ms - 200ms) alter M1 hit registration and cancel timings?
Roblox servers process hit validation through client-to-server replication packets. Under high ping environments, visual hit indicators arrive delayed, leading players to prematurely trigger skill cancels before the server recognizes the 3rd M1 micro-stun.
To compensate for elevated latency, competitive duelists rely upon rhythmic muscle memory rather than visual hit sparks. Delay your skill inputs by an additional 50 to 80 milliseconds following the 3rd punch sound cue.
Furthermore, always turn on Roblox Network Graph (Shift + F3) to verify ping stability before committing to high-stakes 1v1 ranked duels.
Question 22: What are the exact mechanics governing Super Armor and Hyper Armor during move startup?
Super Armor allows a character to absorb incoming normal attacks without suffering stagger hitstun, though full incoming damage is still applied to the health bar. Hyper Armor goes a step further by resisting both normal attacks and minor knockback abilities.
For instance, Genos's Blitz Shot startup possesses initial frame hyper armor, enabling him to blow straight through an opponent's M1 mash. However, dedicated Block Breakers or command grabs (such as Garou's Hunter's Grasp) will instantly shatter Super Armor states.
Recognizing which moves possess startup armor frames is vital for executing defensive reversals against hyper-aggressive rushdown duelists.
Question 23: How do you identify and escape from inescapable infinite wall-bounce loops?
When pinned against skyscraper walls or highway barriers, standard knockback distance is truncated, causing characters to rebound back toward the attacker before ragdoll states conclude.
Opponents exploit this geometry to loop downslams and short-cooldown skills without giving you space to reset neutral. The primary escape window occurs during the initial rebound bounce: tap Q immediately to trigger an angled Tech Roll sideways along the wall plane.
Never roll backwards into the wall itself, as your character will become physically trapped against the geometry, allowing the attacker to re-initiate their combo string.
Question 24: What is the Backdash M1 Turnaround technique and why is it considered tournament-tier tech?
The Backdash M1 Turnaround (commonly called the 'Fadeaway Punch') is an advanced defensive bait technique. When an opponent sprints forward attempting an aggressive dash attack, you tap S + Q to initiate a rapid backwards evasion dash.
The precise instant your backdash animation reaches halfway completion, you immediately press Left Click while flicking your mouse crosshair 180 degrees directly at the charging enemy.
Because your hurtbox shifted backwards out of their range while your forward punch hitbox extends outward, you catch the charging attacker during their recovery frames, guaranteeing a free 4-hit normal combo starter.
Question 25: What are the optimal ergonomic keybind setups and graphics optimizations for maximum frame rate?
Competitive consistency requires unhindered frame rates and swift key actuation. In Roblox settings, lock your Graphics Quality to Manual Level 3 or 4: this renders character hitboxes and telegraph animations with crystalline clarity while stripping away heavy volumetric particle effects and dynamic foliage shadows.
For mouse settings, configure your mouse DPI between 800 and 1200 with a camera sensitivity setting around 0.2 to 0.35. This ensures steady crosshair tracking during high-velocity aerial downslams without jittering off target.
Many elite tournament players bind their Dash key (Q) to a dedicated mouse thumb button (Mouse Button 4 or 5), freeing the left index and ring fingers exclusively for fluid WASD directional movement and rapid 1-4 skill rotations.