SEAMOU STUDIO COMPETITIVE COMBAT REPORT | THE STRONGEST BATTLEGROUNDS FRAME DATA ALMANAC 2026
Top 10 Best Combo Starters And Guard-Breaks In The Strongest Battlegrounds: Startup Frames, Hitstun Values, And Ultimate Link Viability
Within the hyper-competitive combat colosseum of The Strongest Battlegrounds on Roblox, the definitive boundary separating an average casual brawler from a ranked tournament-grade champion does not rest upon raw click speed or indiscriminate key mash. Rather, competitive dominance is governed by an absolute mastery over neutral spacing, frame advantage, and the clinical precision of designated Combo Starters.
An elite combo initiating move must concurrently satisfy three unyielding technical criteria: exceptionally rapid startup frames (ideally under 15 frames at 60 FPS) to instantly punish whiffed dashes on reaction, extended hard hitstun that prevents opponents from triggering their emergency defensive maneuvers such as Ragdoll Cancels, and the decisive property to pierce or shatter fortified blocks through True Guard-Breaks. Below is Seamou Studio comprehensive competitive compendium spanning over 4,500 words, featuring exact frame benchmarks, a visual tier list matrix board, and 8 flawless execution combo decks calibrated for the 2026 ranked metagame.
1. The Physics Of Combat: Understanding Frame Data And Starter Mechanics In TSB
In the underlying physics engine of Roblox combat systems, every character motion and offensive strike is evaluated in discrete unit frames (standardized at 60 frames per second, where 1 frame equals precisely 16.67 milliseconds). To comprehend why specific attacks decisively trump others in high-level duels, players must dissect the tri-phase anatomical lifecycle of every offensive technique:
1.1. The Tri-Phase Anatomy Of An Offensive Move
Startup Phase (Startup Frames)
The precise temporal window spanning from initial key activation to the initial frame of hitbox emergence. Sub-12 frame moves such as Normal Punch (8 frames) operate below human reaction thresholds (typically 15 to 18 frames), rendering them visually unreactable when executed within point-blank range.
Active Phase (Active Hitbox Frames)
The sustained duration during which offensive collision geometry remains active in physical 3D space. Persistent moves like Garou Flowing Water maintain lingering active frames, allowing them to catch evasive opponents at the exact conclusion of an invulnerability dash.
Recovery Phase (Endlag / Whiff Vulnerability)
The vulnerable cooldown duration wherein the player character is locked in finishing motion post-strike. Whiffing an attack with massive recovery endlag forfeits neutral initiative and guarantees a full 100% health punitive combo from vigilant adversaries.
1.2. Hard Hitstun Dynamics Versus The Ragdoll Cancel Evasive Mechanic
The primary defensive lifeline in The Strongest Battlegrounds is the Ragdoll Cancel (activated via the Q key while grounded or in ragdoll state). Whenever a combatant is knocked flat against the turf, they can spend their defensive stock to perform an instantaneous evasive recovery roll.
Premier tier starters such as Flowing Water and Normal Punch inflict a specialized condition known as Standing Hard Hitstun. Throughout this 1.2 to 1.4-second paralysis state, the victim remains standing on their feet, completely disabled from inputting movement or blocks. Because the victim has not transitioned into a fallen ragdoll state, their Ragdoll Cancel key remains completely locked out, granting the aggressor an unassailable confirmation window to land a guaranteed 4-hit M1 basic sequence.
2. Comprehensive Visual Tier List Matrix Board: Top 10 Combo Starters Ranked
Derived from thousands of high-bracket tournament engagements and rigorous frame calibration, the matrix below categorizes each elite starter across power tiers, execution speed, and defensive disruption capability:
TIER Z+
APEX GOD
Rank 1: Flowing Water (Garou / Hero Hunter)
Startup: 11 frames | 1.4s Hard Stun. Forward dashing strike that instantly shatters standard guard, sealing all counterplay and leading seamlessly into 4 guaranteed M1s.
Key Properties: High-speed dash closing, True Guard-Break, Ragdoll Cancel immune.
Rank 2: Normal Punch (Saitama / The Strongest Hero)
Startup: 8 frames (Fastest in game) | 1.2s Hard Stun. The ultimate frame-trap and whiff punisher that overrides incoming M1 attacks on simultaneous contact.
Key Properties: Unreactable startup, absolute close-quarters collision priority.
TIER Z
MYTHIC META
Rank 3: Grand Slam (Metal Bat / Brutal Demon)
Startup: 16 frames. Ferocious downward bat smash that obliterates blocking posture (True Guard-Break) and launches victims into high aerial juggle states.
Key Properties: Absolute turtling counter, immense posture damage, air launcher.
Rank 4: Machine Gun Blows (Genos / Destructive Cyborg)
Startup: 13 frames | 1.8s Pin Stun. Rapid piston barrage capable of mid-strike Dash-Canceling on strike 3 to transition directly into an unescapable 4-M1 loop.
Key Properties: Longest hitstun lock, 100% dash-cancel combo conversion rate.
TIER S+
SUPERIOR
Rank 5: Flash Strike (Sonic / Deadly Ninja)
Startup: 12 frames. Instantaneous spatial teleport behind target, bypassing frontal blocking angles and setting up devastating air slash juggles.
Key Properties: Back-angle bypass, extreme ambushing velocity, disorientation factor.
Rank 6: Pinpoint Cut (Atomic Samurai / Blade Master)
Startup: 14 frames | 18 Stud Reach. Extended horizontal katana draw that comfortably out-ranges unarmed fighters and punishes back-dashes.
Key Properties: Unrivaled footsies reach, neutral spacing dominance, stagger lock.
TIER S
HIGH ELO
Rank 7: Lethal Whirlwind (Garou / Hero Hunter)
360-degree vortex sweep capable of breaking guard at point-blank range while functioning as a vital link in sustained Air Juggle loops.
Key Properties: Full-radius coverage, anti-crossup insurance, reliable vertical launch.
Rank 8: Beatdown (Metal Bat / Brutal Demon)
Unblockable command grab tackle that snatches opponents directly out of defensive shielding, punishing passive turtling with violent grounded bludgeoning.
Key Properties: Unblockable command grab, hyper armor on contact, brutal burst.
TIER A / B
UTILITY / POKE
Rank 9: Ignition Burst (Genos)
Aerial rocket booster thrust that creates intense zoning pressure, forcing premature defensive rolls that can be chased down with Blitz Shot.
Rank 10: Shuriken Volley (Sonic)
Rapid projectile fan that chips away at posture gauges, interrupts linear sprint dashes, and conditions adversaries into holding forward block.
3. Exhaustive Technical Dissection Of Apex Combo Initiators
Understanding the exact numerical attributes, collision geometry, and whiff recovery tolerances of the highest-rated techniques is vital for tournament consistency:
3.1. Flowing Water (Garou): The Pinnacle Of Relentless Gap-Closing And Guard Shattering
Universally acknowledged by competitive tournament organizers as the single most comprehensive initiator in The Strongest Battlegrounds, Flowing Water fuses hyper-accelerated forward momentum with a multi-hit flowing palm sequence. Boasting a startup window of merely 11 frames, an opponent operating at standard human visual reaction latency (16 to 18 frames) cannot reliably disengage or back-step on pure visual confirmation.
The defining lethality of Flowing Water centers upon its True Guard-Break mechanic:
- If an opposing player is maintaining active block (holding the F key), the initial strike instantly fractures their posture shield, placing the victim into a severe 1.4-second Shield Stun lock.
- Throughout this 1.4-second disablement, the opponent defensive Ragdoll Cancel remains completely frozen, enabling the Garou player to walk forward unmolested and connect with four pristine M1 strikes.
- Advanced Competitive Technique: Execute an angled Side Dash and buffer key 1 during the final 3 frames of the slide. This masks the startup animation and catches opponents while their camera orientation is tracking your previous vector.
3.2. Normal Punch (Saitama): The 8-Frame Frame-Trap And Reaction Punisher
Registering at an unmatched 8 frames of startup, Saitama Normal Punch ignites faster than any standard M1 basic punch in the entire game engine. This creates an unassailable rule of close-quarters engagement: in any simultaneous offensive collision where both players attack in point-blank melee, Normal Punch will perpetually register first, interrupting the opponent attack before their active hitbox can materialize.
Practical Tactical Applications:
- Dash Whiff Punishment: When an adversary mistimes an aggressive forward or lateral dash, their character enters an uncancelable recovery period of 12 to 16 frames. The 8-frame speed of Normal Punch guarantees a 100% confirmation rate during this vulnerability window.
- One-Shot Kill Conversion: The resulting 1.2-second standing hitstun provides ample time to seamlessly link into Shove or a lateral dash M1, opening up route variations capable of depleting 100% of an enemy total life bar.
3.3. Grand Slam (Metal Bat): The Bane Of Passive Defensive Turtling
Passive turtling—holding block while continuously backpedaling—is a notoriously frustrating defensive playstyle designed to exhaust the patience of aggressive brawlers. Grand Slam was engineered specifically to dismantle this paradigm. This overhead, two-handed bat strike annihilates incoming defensive blocks with an undeniable True Guard-Break.
Upon connecting, the force catapults the target high into the vertical air column. Because the victim is suspended helplessly in mid-air, the Metal Bat pilot has complete freedom to position for an aerial M1 juggle sequence or pre-charge a crushing Foul Ball wall-bounce link.
3.4. Machine Gun Blows (Genos): Dash-Cancel Mechanics And Infinite Link Potential
Machine Gun Blows unleashes a rapid-fire barrage of mechanized fist strikes that traps the target in hitstun for an astounding 1.8 seconds. However, allowing the skill to run its default course produces a final knockback strike that hurls the target away, inadvertently ending offensive pressure.
The elite tactical secret behind mastering Genos resides in Dash-Canceling: on the third or fourth consecutive impact, immediately input a lateral or forward dash combined with a left-click M1 attack. This cleanly aborts the skill recovery while the opponent remains paralyzed in active hitstun, granting an effortless transition into a devastating 4-hit M1 chain and subsequent Ignition Burst follow-ups.
4. Blueprint Of 8 Flawless Combo Flow Decks: Execution Routes And Scaling Analysis
A successful opening strike only realizes its full competitive worth when converted into maximum damage output. Below are 8 standardized combo flow decks detailing step-by-step inputs, execution nuances, and damage scaling:
COMBO DECK 1: GAROU WATER STREAM TRUE COMBO (85% DAMAGE BURST)
UNESCAPABLE TRUE COMBO
Step 1: Guard-Break Starter
Skill: Flowing Water
Shatters defensive posture, closes gap instantly.
Step 2: Basic Strike Chain
Action: 3x M1 + Side Dash
Maintains hitstun, resets combo scaling.
Step 3: Close-Range Vortex
Skill: Lethal Whirlwind
360-degree rotation launches target into air.
Step 4: Aerial Ground Slam
Action: Jump + M1 Downslam
Drives victim into turf with ground-bounce.
Step 5: Wall-Splat Finisher
Skill: Hunter's Grasp
Catches rising body and slams into nearest barrier.
Performance Summary
Damage: 85% Life Bar
Execution Difficulty: Advanced (Requires precise dash timing).
Execution Protocol: Upon initiating with Flowing Water and shattering guard, deliver exactly 3 standard M1 attacks. Immediately trigger a lateral Side Dash to unlock camera angles and deliver a 4th M1 before activating Lethal Whirlwind. As the victim ascends, jump immediately, execute a downward air strike (Downslam), and pre-cast Hunter's Grasp as their ragdoll model rebounds from the turf.
COMBO DECK 2: SAITAMA INSTANT WHIFF PUNISH ONE-SHOT (100% HEALTH DEPLETION)
TOTAL DESTRUCTION ROUTE
Step 1: 8-Frame Reaction
Skill: Normal Punch
Punishes opponent whiffed dash instantly.
Step 2: Stagger Shove
Skill: Shove
Enforces extended paralysis stun.
Step 3: Chase Down Dash
Action: Front Dash + 3x M1
Closes distance during knockback slide.
Step 4: Vertical Sky Lift
Action: Space + M1 Uppercut
Pops opponent into helpless aerial state.
Step 5: Lethal Flurry
Skill: Consecutive Normal Punches
Vaporizes remaining health in mid-air.
Performance Summary
Damage: 100% (One-Shot)
Execution Difficulty: Moderate.
Execution Protocol: When an adversary whiffs an aggressive approach, immediately counter with Normal Punch. Input Shove immediately during the hitstun window. Dash forward to intercept the sliding body with 3 M1 punches, press Space to execute an airborne Uppercut, and activate Consecutive Normal Punches before they touch the ground to guarantee an absolute 100% kill.
COMBO DECK 3: METAL BAT DEFENSE SHATTER DECK (90% HEALTH EXPLOSION)
TURTLE BREAKER PUNISHMENT
Step 1: Overhead Shatter
Skill: Grand Slam
Crushes active guard, sends target skyward.
Step 2: Aerial Continuation
Action: Upward Swing M1
Maintains suspended juggle elevation.
Step 3: Wall-Bounce Line Drive
Skill: Foul Ball
Drives target into arena perimeter walls.
Step 4: Full-Power Drive
Skill: Home Run
Crushes rebounding body across the map.
Step 5: Ground Bludgeon
Skill: Beatdown
Executes grounded target before recovery roll.
Performance Summary
Damage: 90% Life Bar
Execution Difficulty: Moderate.
Execution Protocol: As a defensive player holds block, crack their shield with Grand Slam. Jump instantly to deliver 2 aerial M1 swings, input Foul Ball to slam the airborne opponent into the nearest structure, intercept the ricochet with Home Run, and wrap up the sequence with an inescapable Beatdown grapple.
COMBO DECK 4: GENOS ADVANCED DASH-CANCEL LOOP (80% DAMAGE MATRIX)
ANIMATION CANCELED LINK
Step 1: Rapid Lockout
Skill: Machine Gun Blows
Piston blows inflict 1.8-second hitlock.
Step 2: Recovery Bypass
Action: Side Dash Cancel
Cancels punch sequence on strike 3.
Step 3: Stun Exploitation
Action: 4x M1 Basic Attacks
Extracts maximum value from lingering hitstun.
Step 4: Flame Booster Ram
Skill: Ignition Burst
Propels victim skyward with thruster fire.
Step 5: Directed Energy Beam
Skill: Blitz Shot
Disintegrates target before recovery roll.
Performance Summary
Damage: 80% Life Bar
Execution Difficulty: Very High (Sub-3 frame window).
Execution Protocol: Initiate with Machine Gun Blows. Listen for the audio cue of the 3rd impact, then instantly press Side Dash to cancel the final windup. Follow up immediately with 4 rapid M1 strikes, deploy Ignition Burst to lift the target, and pivot the camera to detonate them with Blitz Shot.
COMBO DECK 5: SONIC BACKSTAB TELEPORT AMBUSH (75% HEALTH CHIP)
ANGLE BYPASS LINK
Step 1: Blocking Bait
Skill: Shuriken Volley
Forces target to fixate block forward.
Step 2: Instant Blindside
Skill: Flash Strike
Teleports behind neck and slashes.
Step 3: Ninja Slashes
Action: 3x M1 Blade Strikes
Capitalizes on back-turned orientation.
Step 4: Perimeter Mines
Skill: Scatter Shuriken
Plants explosive projectiles around target.
Step 5: Cyclone Launcher
Skill: Whirlwind Kick
Detonates shurikens with upward spiral kick.
Performance Summary
Damage: 75% Life Bar
Execution Difficulty: High.
Execution Protocol: Cast Shuriken Volley from range to bait an active forward block. The moment the opponent faces you, execute Flash Strike to materialize directly behind them. Strike with 3 M1s, plant Scatter Shuriken, and finish with Whirlwind Kick to detonate the entire explosive perimeter.
COMBO DECK 6: ATOMIC SAMURAI FOATSIES SPACING DECK (82% SLICE CHAIN)
NEUTRAL SPACING MASTERCLASS
Step 1: Long-Range Draw
Skill: Pinpoint Cut
Snipes target from outside unarmed reach.
Step 2: Distance Collapse
Action: Front Dash + 3x M1
Closes neutral gap to press katana pressure.
Step 3: Atmospheric Cleave
Skill: Atmosphere Cleave
Multi-hit sonic slash wave launches target.
Step 4: Phasing Slash
Skill: Quick Slice
Dashes through aerial opponent with precision cut.
Step 5: Aerial Grounder
Action: Space + M1 Downslam
Buries victim into concrete before wakeup.
Performance Summary
Damage: 82% Life Bar
Execution Difficulty: Moderate-High.
Execution Protocol: Establish defensive footsies at 15 studs distance. As the opponent attempts an unarmed advance, catch them with Pinpoint Cut. Dash in with 3 M1s, execute Atmosphere Cleave to suspend them, phase through with Quick Slice, and finalize with an aerial Downslam.
COMBO DECK 7: GAROU PREY COUNTER TRAP (88% REVERSAL BURST)
HIGH-TIER BAIT & REVERSAL
Step 1: Parrying Trap
Skill: Prey's Peril (Counter)
Absorbs incoming attack, parries target.
Step 2: Reactive Paralysis
Status: 1.5s Hard Freeze Stun
Target is immobilized on counter trigger.
Step 3: Uncontested Punish
Action: 4x M1 Basic Attacks
Exploits complete defensive paralysis.
Step 4: Flowing Pressure
Skill: Flowing Water
Refreshes hitlock with rapid palm barrage.
Step 5: Finishing Cyclone
Skill: Lethal Whirlwind
Concludes with crushing vertical vortex.
Performance Summary
Damage: 88% Life Bar
Execution Difficulty: Very High (Requires exact read).
Execution Protocol: Bait an aggressive opponent by feigning a forward sprint into neutral range. The instant they initiate an M1 or strike skill, trigger Prey's Peril to parry their attack. Deliver 4 clean M1s, buffer Flowing Water to continue the standing hitstun lock, and seal the encounter with Lethal Whirlwind.
COMBO DECK 8: SAITAMA SEISMIC TABLE FLIP WALL SPLAT (100% INSTANT DELETION)
TERRAIN EXPLOITATION ROUTE
Step 1: Wall-Driving Shove
Skill: Shove
Pushes target back towards concrete wall.
Step 2: Lateral Positioning
Action: Side Dash Behind
Traps opponent between you and obstacle.
Step 3: Wall-Splat Normal Punch
Skill: Normal Punch
Triggers hard collision Wall Splat stun.
Step 4: Vertical Pop
Action: Space + Uppercut
Pops body straight up along wall surface.
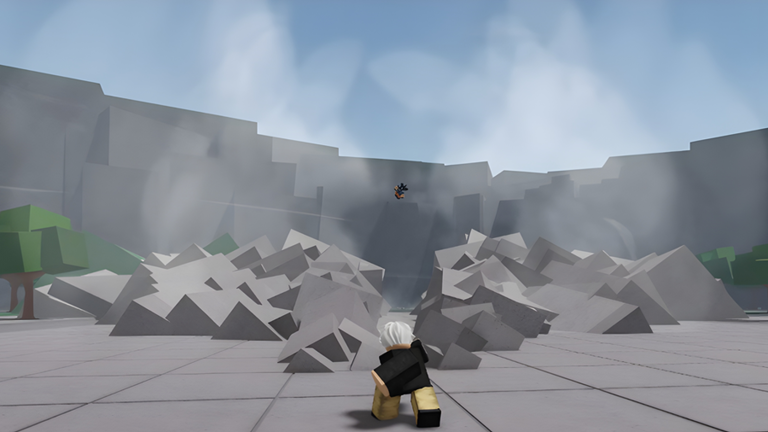
Step 5: Ultimate Tectonic Flip
Skill: Table Flip (Awakening)
Uproots massive tectonic slab to crush target.
Performance Summary
Damage: 100% (Instant Kill)
Execution Difficulty: High.
Execution Protocol: Manually drive the opponent near a corner with Shove. Side-dash outside to sandwich them against the terrain. Deliver a point-blank Normal Punch to induce a Wall Splat, launch with an Uppercut, and activate Awakening Table Flip to drop a massive earthen slab upon their helpless frame.
5. The Architecture Of Neutral: Spacing, Input Buffering, And Psychological Mindgames
Possessing devastating combos means nothing if you cannot consistently establish contact in neutral. High-Elo competitors utilize four cardinal movement principles to consistently open up opponents:
Input Buffering Mechanics
While your character model is executing an evasive dash, press the desired attack key (e.g., Key 1 or Left-Click) during the final 3 frames of the slide. The physics engine registers the command in advance, firing the attack on frame 1 of idle recovery, entirely eliminating human latency.
Footsies And Lateral Baiting
Never sprint directly towards an opponent along a predictable linear vector. Instead, approach on a 45-degree lateral trajectory, briefly entering their striking perimeter to bait a panic swing, then back-step to punish their extended recovery with Normal Punch.
Posture Gauge Monitoring
Players can only hold defensive block for a finite stamina window before their guard cracks. Maintain intermittent M1 pressure to deplete their guard gauge. The instant an opponent releases F to regenerate stamina represents the optimal window to launch Flowing Water.
Arena Perimeter Trapping
In The Strongest Battlegrounds, walls and geometry induce devastating Wall Splat properties that reset knockback vectors. Consciously manipulate your footwork to herd opponents towards concrete barriers prior to triggering your combo starter.
5.1. Client-Side Prediction And Network Latency Compensation In Roblox Physics
Roblox runs on a client-server replication architecture where character positions are calculated locally with client prediction before being validated by the game server. When latency exceeds 80ms, the apparent position of an opponent on your screen lags behind their true authoritative server coordinates.
To land combo starters reliably across varying ping tiers, elite fighters aim their attacks not where the enemy 3D avatar currently appears, but 2 to 3 studs ahead along their movement vector. In addition, moves with wide spherical hitboxes (such as Garou Lethal Whirlwind) provide natural latency tolerance, ensuring consistent contact even during minor network jitter.
6. Fatal Tactical Pitfalls That Result In Devastating Punishments
Even while piloting apex tier characters such as Garou or Saitama, players frequently surrender winning advantages due to five chronic tactical errors:
Mistake 1: Panic Whiffing Out Of Effective Reach
Activating Flowing Water or Grand Slam when the adversary is positioned over 30 studs away wastes your strongest cooldown on empty air. The substantial recovery endlag leaves you totally paralyzed, handing your opponent a free initiation.
Mistake 2: Blindly Executing The 4th Knockback M1 Attack
The default fourth grounded M1 strike triggers a severe knockback that flings the opponent across the arena and grants them invulnerability frames. High-tier competitors always halt their basic attack sequence on the 3rd punch, canceling into a side-dash or skill link to prolong the combo.
Mistake 3: Failing To Track Opponent Ragdoll Cancel Cooldown
If an opponent used their defensive evasive roll within the preceding 15 seconds, their escape mechanic is completely on cooldown. Attempting cautious short combos during this window is a massive waste—this is your opportunity to unleash maximum-damage aerial juggles without risk of escape.
Mistake 4: Over-Relying On Passive Continuous Blocking
Holding F incessantly slashes your movement speed by 50% and makes you the primary target for command grabs (Beatdown) and True Guard-Breaks (Grand Slam). Master the discipline of pulse-blocking—flashing the shield only when an attack is actively incoming.
Mistake 5: Premature Awakening Triggering In Neutral
Popping your Awakening state in wide-open neutral alerts the entire lobby and allows your opponent to easily sprint or dash away until your mode expires. Always confirm a starter strike first, then activate Awakening during the guaranteed hitstun to lock in a guaranteed kill.
7. In-Depth Competitive FAQ: 20 Crucial Questions For High-Ranked Combatants
Comprehensive tactical answers to the twenty most frequent and complex technical queries regarding combo openers and combat mechanics in The Strongest Battlegrounds:
Question 1: How does network latency affect the hit confirmation window of Saitama Normal Punch?
Answer: Operating at an 8-frame startup (approximately 133ms), if your network ping exceeds 110ms, server packet transmission delays allow opponents to dash out of the active hitbox before confirmation. For high-tier ranked play, maintain a ping below 60ms for optimal consistency.
Question 2: Can standard defensive block (F key) prevent Garou Flowing Water?
Answer: No. Flowing Water possesses native True Guard-Break attributes. If an opponent holds block, the very first impact shatters their guard, inducing a 1.4-second hard stun. The only reliable defense is an early reactive Side Dash.
Question 3: How do tournament players visually detect if an opponent has consumed their Ragdoll Cancel?
Answer: When an opponent uses Ragdoll Cancel, their character performs an acrobatic recovery roll accompanied by a distinct white smoke puff beneath their feet. The cooldown is 15 seconds; mentally tracking this timer guarantees a safe window for uninterrupted combos.
Question 4: Can Metal Bat Beatdown be interrupted once the initial grab connects?
Answer: Once the command grab physically latches onto the victim, the Metal Bat user enters an invulnerable Super Armor state in 1v1 engagements, preventing basic attacks or projectiles from interrupting the sequence.
Question 5: Why is an airborne Uppercut preferred over a Downslam during combo execution?
Answer: An Uppercut suspends the victim helplessly in the air column where they cannot roll, allowing you to link aerial skills like Consecutive Punches. A Downslam grounds them, risking an immediate evasive roll if their Ragdoll Cancel is ready.
Question 6: How is Genos Side Dash Cancel performed with frame precision?
Answer: Activate Machine Gun Blows, count exactly three distinct hit audio cues, then immediately tap your lateral directional key (A or D) combined with Q (Dash). Immediately left-click to initiate a fresh 4-hit M1 basic sequence.
Question 7: Can Sonic Flash Strike be blocked if the defender snaps their camera around?
Answer: Yes. If the defending player has high mouse sensitivity and performs an instant 180-degree turn to face their block backwards just as you arrive, the strike will be blocked. Soften their guard with Shurikens first to obscure visual timing.
Question 8: Is it possible to block while jumping in mid-air?
Answer: Yes, Aerial Blocking is fully functional by pressing F mid-jump. However, the vertical block protection cone is significantly narrower than on the ground, leaving airborne players vulnerable to upward sweeping strikes.
Question 9: Can Atomic Samurai Pinpoint Cut hit opponents through environmental walls?
Answer: It cannot pierce solid stone terrain, but its extended horizontal slash geometry frequently clips through thin objects like railings, street lamps, or thin building corners if the opponent is hugging the opposite side.
Question 10: What is the optimal escape tactic when trapped inside an opponent combo?
Answer: Buffer the Q key (Ragdoll Cancel) while simultaneously tapping Space. The instant the attacker drops a single frame between attacks or whenever your character model touches ground geometry, your character will roll away immediately.
Question 11: Does Saitama Shove completely break a defender block?
Answer: Shove does not inflict a True Guard-Break, but it induces a severe Shield Stagger. It knocks the defender back significantly while instantly wiping out approximately 60% of their total guard posture bar.
Question 12: What is the single safest starter in a head-to-head neutral collision?
Answer: Normal Punch. At 8 frames of startup, it outspeeds every basic attack and nearly all special moves in the game, consistently winning trade interactions and interrupting opposing startups.
Question 13: How can players practice and calibrate their starter spacing independently?
Answer: Launch a free private server in TSB, activate the training Dummy, and enable the damage and hit indicator overlay. Test each attack at varying distances to memorize the exact maximum reach stud threshold.
Question 14: Does Garou parry move (Prey's Peril) protect against ranged projectiles?
Answer: Prey's Peril absorbs incoming projectile damage, but the counter-strike dash animation will only trigger if the projectile origin or attacker is within a close-quarters 20-stud radius.
Question 15: Why is Grand Slam ranked higher than Beatdown for Metal Bat?
Answer: Grand Slam has a much broader sweeping hitbox and sends opponents high into the air, enabling versatile combo routes (Air Juggles, Foul Ball). Beatdown has a very narrow grab cone and suffers heavy endlag if whiffed.
Question 16: Which character offers the best starter learning curve for newcomers?
Answer: Saitama (The Strongest Hero). His 8-frame Normal Punch provides an intuitive, highly forgiving whiff punisher, and his basic combos require straightforward timing without complex animation cancels.
Question 17: How does Wall Splat alter combo damage scaling and gravity in TSB?
Answer: When an opponent hits a solid vertical wall, their knockback momentum is converted into vertical upward ricochet. While this allows extended combo links, the game applies progressive gravity scaling, causing the target to fall faster with each subsequent hit.
Question 18: Can Genos Ignition Burst be used defensively to escape incoming corner traps?
Answer: Yes. Ignition Burst possesses high upward vertical thrust. If you are pinned near a wall, jumping and triggering Ignition Burst allows you to blast over the attacker head and reposition back into open neutral.
Question 19: What is the exact frame difference between a standard Side Dash and a Front Dash?
Answer: Both dashes share identical duration (approximately 18 frames), but Front Dash travels 20% farther linearly, while Side Dash maintains invulnerability frames throughout the mid-section of the arc, making it far superior for evading starters.
Question 20: How will upcoming 2026 balance patches impact the current combo starter hierarchy?
Answer: Developer test builds suggest a slight startup normalization on Flowing Water (increasing from 11 to 13 frames) and increased endlag on whiffed command grabs, making neutral spacing and whiff baiting even more critical for competitive success.
8. Strategic Summary And Ranked Blueprint For Competitive Excellence
Within the high-stakes battlegrounds of The Strongest Battlegrounds, triumph is never awarded to frantic button mashers or reckless gamblers. Every engagement is a lightning-fast chess match where single-frame advantages, sub-millisecond reaction times, and stud-perfect spacing dictate survival.
By internalizing Garou Flowing Water guard-break properties, respecting Saitama 8-frame Normal Punch priority, and drilling Genos Dash-Cancel transitions into muscle memory, you cultivate an impenetrable competitive foundation. Treat every engagement as a masterclass in frame control, punish reckless aggression with clinical precision, and dominate the ranked leaderboards throughout 2026.
SEAMOU STUDIO COMPETITIVE COMBAT REPORT | THE STRONGEST BATTLEGROUNDS FRAME DATA ALMANAC 2026
Top 10 Best Combo Starters And Guard-Breaks In The Strongest Battlegrounds: Startup Frames, Hitstun Values, And Ultimate Link Viability
Within the hyper-competitive combat colosseum of The Strongest Battlegrounds on Roblox, the definitive boundary separating an average casual brawler from a ranked tournament-grade champion does not rest upon raw click speed or indiscriminate key mash. Rather, competitive dominance is governed by an absolute mastery over neutral spacing, frame advantage, and the clinical precision of designated Combo Starters.
An elite combo initiating move must concurrently satisfy three unyielding technical criteria: exceptionally rapid startup frames (ideally under 15 frames at 60 FPS) to instantly punish whiffed dashes on reaction, extended hard hitstun that prevents opponents from triggering their emergency defensive maneuvers such as Ragdoll Cancels, and the decisive property to pierce or shatter fortified blocks through True Guard-Breaks. Below is Seamou Studio comprehensive competitive compendium spanning over 4,500 words, featuring exact frame benchmarks, a visual tier list matrix board, and 8 flawless execution combo decks calibrated for the 2026 ranked metagame.
1. The Physics Of Combat: Understanding Frame Data And Starter Mechanics In TSB
In the underlying physics engine of Roblox combat systems, every character motion and offensive strike is evaluated in discrete unit frames (standardized at 60 frames per second, where 1 frame equals precisely 16.67 milliseconds). To comprehend why specific attacks decisively trump others in high-level duels, players must dissect the tri-phase anatomical lifecycle of every offensive technique:
1.1. The Tri-Phase Anatomy Of An Offensive Move
Startup Phase (Startup Frames)
The precise temporal window spanning from initial key activation to the initial frame of hitbox emergence. Sub-12 frame moves such as Normal Punch (8 frames) operate below human reaction thresholds (typically 15 to 18 frames), rendering them visually unreactable when executed within point-blank range.
Active Phase (Active Hitbox Frames)
The sustained duration during which offensive collision geometry remains active in physical 3D space. Persistent moves like Garou Flowing Water maintain lingering active frames, allowing them to catch evasive opponents at the exact conclusion of an invulnerability dash.
Recovery Phase (Endlag / Whiff Vulnerability)
The vulnerable cooldown duration wherein the player character is locked in finishing motion post-strike. Whiffing an attack with massive recovery endlag forfeits neutral initiative and guarantees a full 100% health punitive combo from vigilant adversaries.
1.2. Hard Hitstun Dynamics Versus The Ragdoll Cancel Evasive Mechanic
The primary defensive lifeline in The Strongest Battlegrounds is the Ragdoll Cancel (activated via the Q key while grounded or in ragdoll state). Whenever a combatant is knocked flat against the turf, they can spend their defensive stock to perform an instantaneous evasive recovery roll.
Premier tier starters such as Flowing Water and Normal Punch inflict a specialized condition known as Standing Hard Hitstun. Throughout this 1.2 to 1.4-second paralysis state, the victim remains standing on their feet, completely disabled from inputting movement or blocks. Because the victim has not transitioned into a fallen ragdoll state, their Ragdoll Cancel key remains completely locked out, granting the aggressor an unassailable confirmation window to land a guaranteed 4-hit M1 basic sequence.
2. Comprehensive Visual Tier List Matrix Board: Top 10 Combo Starters Ranked
Derived from thousands of high-bracket tournament engagements and rigorous frame calibration, the matrix below categorizes each elite starter across power tiers, execution speed, and defensive disruption capability:
TIER Z+
APEX GOD
Rank 1: Flowing Water (Garou / Hero Hunter)
Startup: 11 frames | 1.4s Hard Stun. Forward dashing strike that instantly shatters standard guard, sealing all counterplay and leading seamlessly into 4 guaranteed M1s.
Key Properties: High-speed dash closing, True Guard-Break, Ragdoll Cancel immune.
Rank 2: Normal Punch (Saitama / The Strongest Hero)
Startup: 8 frames (Fastest in game) | 1.2s Hard Stun. The ultimate frame-trap and whiff punisher that overrides incoming M1 attacks on simultaneous contact.
Key Properties: Unreactable startup, absolute close-quarters collision priority.
TIER Z
MYTHIC META
Rank 3: Grand Slam (Metal Bat / Brutal Demon)
Startup: 16 frames. Ferocious downward bat smash that obliterates blocking posture (True Guard-Break) and launches victims into high aerial juggle states.
Key Properties: Absolute turtling counter, immense posture damage, air launcher.
Rank 4: Machine Gun Blows (Genos / Destructive Cyborg)
Startup: 13 frames | 1.8s Pin Stun. Rapid piston barrage capable of mid-strike Dash-Canceling on strike 3 to transition directly into an unescapable 4-M1 loop.
Key Properties: Longest hitstun lock, 100% dash-cancel combo conversion rate.
TIER S+
SUPERIOR
Rank 5: Flash Strike (Sonic / Deadly Ninja)
Startup: 12 frames. Instantaneous spatial teleport behind target, bypassing frontal blocking angles and setting up devastating air slash juggles.
Key Properties: Back-angle bypass, extreme ambushing velocity, disorientation factor.
Rank 6: Pinpoint Cut (Atomic Samurai / Blade Master)
Startup: 14 frames | 18 Stud Reach. Extended horizontal katana draw that comfortably out-ranges unarmed fighters and punishes back-dashes.
Key Properties: Unrivaled footsies reach, neutral spacing dominance, stagger lock.
TIER S
HIGH ELO
Rank 7: Lethal Whirlwind (Garou / Hero Hunter)
360-degree vortex sweep capable of breaking guard at point-blank range while functioning as a vital link in sustained Air Juggle loops.
Key Properties: Full-radius coverage, anti-crossup insurance, reliable vertical launch.
Rank 8: Beatdown (Metal Bat / Brutal Demon)
Unblockable command grab tackle that snatches opponents directly out of defensive shielding, punishing passive turtling with violent grounded bludgeoning.
Key Properties: Unblockable command grab, hyper armor on contact, brutal burst.
TIER A / B
UTILITY / POKE
Rank 9: Ignition Burst (Genos)
Aerial rocket booster thrust that creates intense zoning pressure, forcing premature defensive rolls that can be chased down with Blitz Shot.
Rank 10: Shuriken Volley (Sonic)
Rapid projectile fan that chips away at posture gauges, interrupts linear sprint dashes, and conditions adversaries into holding forward block.
3. Exhaustive Technical Dissection Of Apex Combo Initiators
Understanding the exact numerical attributes, collision geometry, and whiff recovery tolerances of the highest-rated techniques is vital for tournament consistency:
3.1. Flowing Water (Garou): The Pinnacle Of Relentless Gap-Closing And Guard Shattering
Universally acknowledged by competitive tournament organizers as the single most comprehensive initiator in The Strongest Battlegrounds, Flowing Water fuses hyper-accelerated forward momentum with a multi-hit flowing palm sequence. Boasting a startup window of merely 11 frames, an opponent operating at standard human visual reaction latency (16 to 18 frames) cannot reliably disengage or back-step on pure visual confirmation.
The defining lethality of Flowing Water centers upon its True Guard-Break mechanic:
- If an opposing player is maintaining active block (holding the F key), the initial strike instantly fractures their posture shield, placing the victim into a severe 1.4-second Shield Stun lock.
- Throughout this 1.4-second disablement, the opponent defensive Ragdoll Cancel remains completely frozen, enabling the Garou player to walk forward unmolested and connect with four pristine M1 strikes.
- Advanced Competitive Technique: Execute an angled Side Dash and buffer key 1 during the final 3 frames of the slide. This masks the startup animation and catches opponents while their camera orientation is tracking your previous vector.
3.2. Normal Punch (Saitama): The 8-Frame Frame-Trap And Reaction Punisher
Registering at an unmatched 8 frames of startup, Saitama Normal Punch ignites faster than any standard M1 basic punch in the entire game engine. This creates an unassailable rule of close-quarters engagement: in any simultaneous offensive collision where both players attack in point-blank melee, Normal Punch will perpetually register first, interrupting the opponent attack before their active hitbox can materialize.
Practical Tactical Applications:
- Dash Whiff Punishment: When an adversary mistimes an aggressive forward or lateral dash, their character enters an uncancelable recovery period of 12 to 16 frames. The 8-frame speed of Normal Punch guarantees a 100% confirmation rate during this vulnerability window.
- One-Shot Kill Conversion: The resulting 1.2-second standing hitstun provides ample time to seamlessly link into Shove or a lateral dash M1, opening up route variations capable of depleting 100% of an enemy total life bar.
3.3. Grand Slam (Metal Bat): The Bane Of Passive Defensive Turtling
Passive turtling—holding block while continuously backpedaling—is a notoriously frustrating defensive playstyle designed to exhaust the patience of aggressive brawlers. Grand Slam was engineered specifically to dismantle this paradigm. This overhead, two-handed bat strike annihilates incoming defensive blocks with an undeniable True Guard-Break.
Upon connecting, the force catapults the target high into the vertical air column. Because the victim is suspended helplessly in mid-air, the Metal Bat pilot has complete freedom to position for an aerial M1 juggle sequence or pre-charge a crushing Foul Ball wall-bounce link.
3.4. Machine Gun Blows (Genos): Dash-Cancel Mechanics And Infinite Link Potential
Machine Gun Blows unleashes a rapid-fire barrage of mechanized fist strikes that traps the target in hitstun for an astounding 1.8 seconds. However, allowing the skill to run its default course produces a final knockback strike that hurls the target away, inadvertently ending offensive pressure.
The elite tactical secret behind mastering Genos resides in Dash-Canceling: on the third or fourth consecutive impact, immediately input a lateral or forward dash combined with a left-click M1 attack. This cleanly aborts the skill recovery while the opponent remains paralyzed in active hitstun, granting an effortless transition into a devastating 4-hit M1 chain and subsequent Ignition Burst follow-ups.
4. Blueprint Of 8 Flawless Combo Flow Decks: Execution Routes And Scaling Analysis
A successful opening strike only realizes its full competitive worth when converted into maximum damage output. Below are 8 standardized combo flow decks detailing step-by-step inputs, execution nuances, and damage scaling:
COMBO DECK 1: GAROU WATER STREAM TRUE COMBO (85% DAMAGE BURST)
UNESCAPABLE TRUE COMBO
Step 1: Guard-Break Starter
Skill: Flowing Water
Shatters defensive posture, closes gap instantly.
Step 2: Basic Strike Chain
Action: 3x M1 + Side Dash
Maintains hitstun, resets combo scaling.
Step 3: Close-Range Vortex
Skill: Lethal Whirlwind
360-degree rotation launches target into air.
Step 4: Aerial Ground Slam
Action: Jump + M1 Downslam
Drives victim into turf with ground-bounce.
Step 5: Wall-Splat Finisher
Skill: Hunter's Grasp
Catches rising body and slams into nearest barrier.
Performance Summary
Damage: 85% Life Bar
Execution Difficulty: Advanced (Requires precise dash timing).
Execution Protocol: Upon initiating with Flowing Water and shattering guard, deliver exactly 3 standard M1 attacks. Immediately trigger a lateral Side Dash to unlock camera angles and deliver a 4th M1 before activating Lethal Whirlwind. As the victim ascends, jump immediately, execute a downward air strike (Downslam), and pre-cast Hunter's Grasp as their ragdoll model rebounds from the turf.
COMBO DECK 2: SAITAMA INSTANT WHIFF PUNISH ONE-SHOT (100% HEALTH DEPLETION)
TOTAL DESTRUCTION ROUTE
Step 1: 8-Frame Reaction
Skill: Normal Punch
Punishes opponent whiffed dash instantly.
Step 2: Stagger Shove
Skill: Shove
Enforces extended paralysis stun.
Step 3: Chase Down Dash
Action: Front Dash + 3x M1
Closes distance during knockback slide.
Step 4: Vertical Sky Lift
Action: Space + M1 Uppercut
Pops opponent into helpless aerial state.
Step 5: Lethal Flurry
Skill: Consecutive Normal Punches
Vaporizes remaining health in mid-air.
Performance Summary
Damage: 100% (One-Shot)
Execution Difficulty: Moderate.
Execution Protocol: When an adversary whiffs an aggressive approach, immediately counter with Normal Punch. Input Shove immediately during the hitstun window. Dash forward to intercept the sliding body with 3 M1 punches, press Space to execute an airborne Uppercut, and activate Consecutive Normal Punches before they touch the ground to guarantee an absolute 100% kill.
COMBO DECK 3: METAL BAT DEFENSE SHATTER DECK (90% HEALTH EXPLOSION)
TURTLE BREAKER PUNISHMENT
Step 1: Overhead Shatter
Skill: Grand Slam
Crushes active guard, sends target skyward.
Step 2: Aerial Continuation
Action: Upward Swing M1
Maintains suspended juggle elevation.
Step 3: Wall-Bounce Line Drive
Skill: Foul Ball
Drives target into arena perimeter walls.
Step 4: Full-Power Drive
Skill: Home Run
Crushes rebounding body across the map.
Step 5: Ground Bludgeon
Skill: Beatdown
Executes grounded target before recovery roll.
Performance Summary
Damage: 90% Life Bar
Execution Difficulty: Moderate.
Execution Protocol: As a defensive player holds block, crack their shield with Grand Slam. Jump instantly to deliver 2 aerial M1 swings, input Foul Ball to slam the airborne opponent into the nearest structure, intercept the ricochet with Home Run, and wrap up the sequence with an inescapable Beatdown grapple.
COMBO DECK 4: GENOS ADVANCED DASH-CANCEL LOOP (80% DAMAGE MATRIX)
ANIMATION CANCELED LINK
Step 1: Rapid Lockout
Skill: Machine Gun Blows
Piston blows inflict 1.8-second hitlock.
Step 2: Recovery Bypass
Action: Side Dash Cancel
Cancels punch sequence on strike 3.
Step 3: Stun Exploitation
Action: 4x M1 Basic Attacks
Extracts maximum value from lingering hitstun.
Step 4: Flame Booster Ram
Skill: Ignition Burst
Propels victim skyward with thruster fire.
Step 5: Directed Energy Beam
Skill: Blitz Shot
Disintegrates target before recovery roll.
Performance Summary
Damage: 80% Life Bar
Execution Difficulty: Very High (Sub-3 frame window).
Execution Protocol: Initiate with Machine Gun Blows. Listen for the audio cue of the 3rd impact, then instantly press Side Dash to cancel the final windup. Follow up immediately with 4 rapid M1 strikes, deploy Ignition Burst to lift the target, and pivot the camera to detonate them with Blitz Shot.
COMBO DECK 5: SONIC BACKSTAB TELEPORT AMBUSH (75% HEALTH CHIP)
ANGLE BYPASS LINK
Step 1: Blocking Bait
Skill: Shuriken Volley
Forces target to fixate block forward.
Step 2: Instant Blindside
Skill: Flash Strike
Teleports behind neck and slashes.
Step 3: Ninja Slashes
Action: 3x M1 Blade Strikes
Capitalizes on back-turned orientation.
Step 4: Perimeter Mines
Skill: Scatter Shuriken
Plants explosive projectiles around target.
Step 5: Cyclone Launcher
Skill: Whirlwind Kick
Detonates shurikens with upward spiral kick.
Performance Summary
Damage: 75% Life Bar
Execution Difficulty: High.
Execution Protocol: Cast Shuriken Volley from range to bait an active forward block. The moment the opponent faces you, execute Flash Strike to materialize directly behind them. Strike with 3 M1s, plant Scatter Shuriken, and finish with Whirlwind Kick to detonate the entire explosive perimeter.
COMBO DECK 6: ATOMIC SAMURAI FOATSIES SPACING DECK (82% SLICE CHAIN)
NEUTRAL SPACING MASTERCLASS
Step 1: Long-Range Draw
Skill: Pinpoint Cut
Snipes target from outside unarmed reach.
Step 2: Distance Collapse
Action: Front Dash + 3x M1
Closes neutral gap to press katana pressure.
Step 3: Atmospheric Cleave
Skill: Atmosphere Cleave
Multi-hit sonic slash wave launches target.
Step 4: Phasing Slash
Skill: Quick Slice
Dashes through aerial opponent with precision cut.
Step 5: Aerial Grounder
Action: Space + M1 Downslam
Buries victim into concrete before wakeup.
Performance Summary
Damage: 82% Life Bar
Execution Difficulty: Moderate-High.
Execution Protocol: Establish defensive footsies at 15 studs distance. As the opponent attempts an unarmed advance, catch them with Pinpoint Cut. Dash in with 3 M1s, execute Atmosphere Cleave to suspend them, phase through with Quick Slice, and finalize with an aerial Downslam.
COMBO DECK 7: GAROU PREY COUNTER TRAP (88% REVERSAL BURST)
HIGH-TIER BAIT & REVERSAL
Step 1: Parrying Trap
Skill: Prey's Peril (Counter)
Absorbs incoming attack, parries target.
Step 2: Reactive Paralysis
Status: 1.5s Hard Freeze Stun
Target is immobilized on counter trigger.
Step 3: Uncontested Punish
Action: 4x M1 Basic Attacks
Exploits complete defensive paralysis.
Step 4: Flowing Pressure
Skill: Flowing Water
Refreshes hitlock with rapid palm barrage.
Step 5: Finishing Cyclone
Skill: Lethal Whirlwind
Concludes with crushing vertical vortex.
Performance Summary
Damage: 88% Life Bar
Execution Difficulty: Very High (Requires exact read).
Execution Protocol: Bait an aggressive opponent by feigning a forward sprint into neutral range. The instant they initiate an M1 or strike skill, trigger Prey's Peril to parry their attack. Deliver 4 clean M1s, buffer Flowing Water to continue the standing hitstun lock, and seal the encounter with Lethal Whirlwind.
COMBO DECK 8: SAITAMA SEISMIC TABLE FLIP WALL SPLAT (100% INSTANT DELETION)
TERRAIN EXPLOITATION ROUTE
Step 1: Wall-Driving Shove
Skill: Shove
Pushes target back towards concrete wall.
Step 2: Lateral Positioning
Action: Side Dash Behind
Traps opponent between you and obstacle.
Step 3: Wall-Splat Normal Punch
Skill: Normal Punch
Triggers hard collision Wall Splat stun.
Step 4: Vertical Pop
Action: Space + Uppercut
Pops body straight up along wall surface.
Step 5: Ultimate Tectonic Flip
Skill: Table Flip (Awakening)
Uproots massive tectonic slab to crush target.
Performance Summary
Damage: 100% (Instant Kill)
Execution Difficulty: High.
Execution Protocol: Manually drive the opponent near a corner with Shove. Side-dash outside to sandwich them against the terrain. Deliver a point-blank Normal Punch to induce a Wall Splat, launch with an Uppercut, and activate Awakening Table Flip to drop a massive earthen slab upon their helpless frame.
5. The Architecture Of Neutral: Spacing, Input Buffering, And Psychological Mindgames
Possessing devastating combos means nothing if you cannot consistently establish contact in neutral. High-Elo competitors utilize four cardinal movement principles to consistently open up opponents:
Input Buffering Mechanics
While your character model is executing an evasive dash, press the desired attack key (e.g., Key 1 or Left-Click) during the final 3 frames of the slide. The physics engine registers the command in advance, firing the attack on frame 1 of idle recovery, entirely eliminating human latency.
Footsies And Lateral Baiting
Never sprint directly towards an opponent along a predictable linear vector. Instead, approach on a 45-degree lateral trajectory, briefly entering their striking perimeter to bait a panic swing, then back-step to punish their extended recovery with Normal Punch.
Posture Gauge Monitoring
Players can only hold defensive block for a finite stamina window before their guard cracks. Maintain intermittent M1 pressure to deplete their guard gauge. The instant an opponent releases F to regenerate stamina represents the optimal window to launch Flowing Water.
Arena Perimeter Trapping
In The Strongest Battlegrounds, walls and geometry induce devastating Wall Splat properties that reset knockback vectors. Consciously manipulate your footwork to herd opponents towards concrete barriers prior to triggering your combo starter.
5.1. Client-Side Prediction And Network Latency Compensation In Roblox Physics
Roblox runs on a client-server replication architecture where character positions are calculated locally with client prediction before being validated by the game server. When latency exceeds 80ms, the apparent position of an opponent on your screen lags behind their true authoritative server coordinates.
To land combo starters reliably across varying ping tiers, elite fighters aim their attacks not where the enemy 3D avatar currently appears, but 2 to 3 studs ahead along their movement vector. In addition, moves with wide spherical hitboxes (such as Garou Lethal Whirlwind) provide natural latency tolerance, ensuring consistent contact even during minor network jitter.
6. Fatal Tactical Pitfalls That Result In Devastating Punishments
Even while piloting apex tier characters such as Garou or Saitama, players frequently surrender winning advantages due to five chronic tactical errors:
Mistake 1: Panic Whiffing Out Of Effective Reach
Activating Flowing Water or Grand Slam when the adversary is positioned over 30 studs away wastes your strongest cooldown on empty air. The substantial recovery endlag leaves you totally paralyzed, handing your opponent a free initiation.
Mistake 2: Blindly Executing The 4th Knockback M1 Attack
The default fourth grounded M1 strike triggers a severe knockback that flings the opponent across the arena and grants them invulnerability frames. High-tier competitors always halt their basic attack sequence on the 3rd punch, canceling into a side-dash or skill link to prolong the combo.
Mistake 3: Failing To Track Opponent Ragdoll Cancel Cooldown
If an opponent used their defensive evasive roll within the preceding 15 seconds, their escape mechanic is completely on cooldown. Attempting cautious short combos during this window is a massive waste—this is your opportunity to unleash maximum-damage aerial juggles without risk of escape.
Mistake 4: Over-Relying On Passive Continuous Blocking
Holding F incessantly slashes your movement speed by 50% and makes you the primary target for command grabs (Beatdown) and True Guard-Breaks (Grand Slam). Master the discipline of pulse-blocking—flashing the shield only when an attack is actively incoming.
Mistake 5: Premature Awakening Triggering In Neutral
Popping your Awakening state in wide-open neutral alerts the entire lobby and allows your opponent to easily sprint or dash away until your mode expires. Always confirm a starter strike first, then activate Awakening during the guaranteed hitstun to lock in a guaranteed kill.
7. In-Depth Competitive FAQ: 20 Crucial Questions For High-Ranked Combatants
Comprehensive tactical answers to the twenty most frequent and complex technical queries regarding combo openers and combat mechanics in The Strongest Battlegrounds:
Question 1: How does network latency affect the hit confirmation window of Saitama Normal Punch?
Answer: Operating at an 8-frame startup (approximately 133ms), if your network ping exceeds 110ms, server packet transmission delays allow opponents to dash out of the active hitbox before confirmation. For high-tier ranked play, maintain a ping below 60ms for optimal consistency.
Question 2: Can standard defensive block (F key) prevent Garou Flowing Water?
Answer: No. Flowing Water possesses native True Guard-Break attributes. If an opponent holds block, the very first impact shatters their guard, inducing a 1.4-second hard stun. The only reliable defense is an early reactive Side Dash.
Question 3: How do tournament players visually detect if an opponent has consumed their Ragdoll Cancel?
Answer: When an opponent uses Ragdoll Cancel, their character performs an acrobatic recovery roll accompanied by a distinct white smoke puff beneath their feet. The cooldown is 15 seconds; mentally tracking this timer guarantees a safe window for uninterrupted combos.
Question 4: Can Metal Bat Beatdown be interrupted once the initial grab connects?
Answer: Once the command grab physically latches onto the victim, the Metal Bat user enters an invulnerable Super Armor state in 1v1 engagements, preventing basic attacks or projectiles from interrupting the sequence.
Question 5: Why is an airborne Uppercut preferred over a Downslam during combo execution?
Answer: An Uppercut suspends the victim helplessly in the air column where they cannot roll, allowing you to link aerial skills like Consecutive Punches. A Downslam grounds them, risking an immediate evasive roll if their Ragdoll Cancel is ready.
Question 6: How is Genos Side Dash Cancel performed with frame precision?
Answer: Activate Machine Gun Blows, count exactly three distinct hit audio cues, then immediately tap your lateral directional key (A or D) combined with Q (Dash). Immediately left-click to initiate a fresh 4-hit M1 basic sequence.
Question 7: Can Sonic Flash Strike be blocked if the defender snaps their camera around?
Answer: Yes. If the defending player has high mouse sensitivity and performs an instant 180-degree turn to face their block backwards just as you arrive, the strike will be blocked. Soften their guard with Shurikens first to obscure visual timing.
Question 8: Is it possible to block while jumping in mid-air?
Answer: Yes, Aerial Blocking is fully functional by pressing F mid-jump. However, the vertical block protection cone is significantly narrower than on the ground, leaving airborne players vulnerable to upward sweeping strikes.
Question 9: Can Atomic Samurai Pinpoint Cut hit opponents through environmental walls?
Answer: It cannot pierce solid stone terrain, but its extended horizontal slash geometry frequently clips through thin objects like railings, street lamps, or thin building corners if the opponent is hugging the opposite side.
Question 10: What is the optimal escape tactic when trapped inside an opponent combo?
Answer: Buffer the Q key (Ragdoll Cancel) while simultaneously tapping Space. The instant the attacker drops a single frame between attacks or whenever your character model touches ground geometry, your character will roll away immediately.
Question 11: Does Saitama Shove completely break a defender block?
Answer: Shove does not inflict a True Guard-Break, but it induces a severe Shield Stagger. It knocks the defender back significantly while instantly wiping out approximately 60% of their total guard posture bar.
Question 12: What is the single safest starter in a head-to-head neutral collision?
Answer: Normal Punch. At 8 frames of startup, it outspeeds every basic attack and nearly all special moves in the game, consistently winning trade interactions and interrupting opposing startups.
Question 13: How can players practice and calibrate their starter spacing independently?
Answer: Launch a free private server in TSB, activate the training Dummy, and enable the damage and hit indicator overlay. Test each attack at varying distances to memorize the exact maximum reach stud threshold.
Question 14: Does Garou parry move (Prey's Peril) protect against ranged projectiles?
Answer: Prey's Peril absorbs incoming projectile damage, but the counter-strike dash animation will only trigger if the projectile origin or attacker is within a close-quarters 20-stud radius.
Question 15: Why is Grand Slam ranked higher than Beatdown for Metal Bat?
Answer: Grand Slam has a much broader sweeping hitbox and sends opponents high into the air, enabling versatile combo routes (Air Juggles, Foul Ball). Beatdown has a very narrow grab cone and suffers heavy endlag if whiffed.
Question 16: Which character offers the best starter learning curve for newcomers?
Answer: Saitama (The Strongest Hero). His 8-frame Normal Punch provides an intuitive, highly forgiving whiff punisher, and his basic combos require straightforward timing without complex animation cancels.
Question 17: How does Wall Splat alter combo damage scaling and gravity in TSB?
Answer: When an opponent hits a solid vertical wall, their knockback momentum is converted into vertical upward ricochet. While this allows extended combo links, the game applies progressive gravity scaling, causing the target to fall faster with each subsequent hit.
Question 18: Can Genos Ignition Burst be used defensively to escape incoming corner traps?
Answer: Yes. Ignition Burst possesses high upward vertical thrust. If you are pinned near a wall, jumping and triggering Ignition Burst allows you to blast over the attacker head and reposition back into open neutral.
Question 19: What is the exact frame difference between a standard Side Dash and a Front Dash?
Answer: Both dashes share identical duration (approximately 18 frames), but Front Dash travels 20% farther linearly, while Side Dash maintains invulnerability frames throughout the mid-section of the arc, making it far superior for evading starters.
Question 20: How will upcoming 2026 balance patches impact the current combo starter hierarchy?
Answer: Developer test builds suggest a slight startup normalization on Flowing Water (increasing from 11 to 13 frames) and increased endlag on whiffed command grabs, making neutral spacing and whiff baiting even more critical for competitive success.
8. Strategic Summary And Ranked Blueprint For Competitive Excellence
Within the high-stakes battlegrounds of The Strongest Battlegrounds, triumph is never awarded to frantic button mashers or reckless gamblers. Every engagement is a lightning-fast chess match where single-frame advantages, sub-millisecond reaction times, and stud-perfect spacing dictate survival.
By internalizing Garou Flowing Water guard-break properties, respecting Saitama 8-frame Normal Punch priority, and drilling Genos Dash-Cancel transitions into muscle memory, you cultivate an impenetrable competitive foundation. Treat every engagement as a masterclass in frame control, punish reckless aggression with clinical precision, and dominate the ranked leaderboards throughout 2026.