
1. Comprehensive The Strongest Battlegrounds Meta Compendium: Advanced Fighting Physics & Mechanics
Within the hyper-competitive arena of Roblox action combat experiences, The Strongest Battlegrounds (TSB) by Yielding Arts has established itself as an undisputed esports benchmark, captivating hundreds of thousands of active combatants globally. Distancing itself entirely from stat-bloated role-playing games or chance-based progression loops, The Strongest Battlegrounds represents a pure test of mechanical execution and frame-level decision making. Victory and defeat are adjudicated within mere milliseconds across fundamental physics interactions: neutral M1 priority clashes, dash animation cancelling, wall splat geometry, evasive cooldown tracking, and high-stakes Awakening meter management.
Each combatant in TSB is faithfully adapted from the One Punch Man universe, possessing bespoke frame data, reach profiles, and interaction properties. From the fluid, frame-trapping martial arts of Garou and the devastating raw physical impact of Saitama, to the lightning-fast spatial severing of Atomic Samurai, the suppressive zoning fire of Genos, and the cataclysmic celestial rushes of Boros; each character occupies a distinct tactical role within the competitive tier matrix.
To provide the competitive community with an exhaustive, mathematically grounded, and completely objective reference, Seamou Studio presents the Comprehensive Character Tier List and Technical Matrix for The Strongest Battlegrounds: an exhaustive guide dissecting frame advantage, 1v1 Ranked duel synergies, 8 standard execution decks, and 20 crucial tactical inquiries.
1. Neutral M1 Priority & Clashing Physics
The basic four-hit M1 attack string forms the baseline of all combat engagements. While the fourth hit delivers a hard knockback, competitive players routinely halt at the third strike to seamlessly link special abilities into true, unescapable combos.
When two fighters trade M1 attacks simultaneously, the character with superior startup frame timing or cleaner spacing secures priority, thrusting the opponent into immediate blockstun or hitstun states.
2. Evasive Mechanic & The 20-Second Clock
The Evasive maneuver (Q-dash during hitstun) allows a player to immediately break free from an active combo string, repositioning laterally or backwards to re-establish defensive neutral.
Crucially, Evasive incurs an unyielding 20-second cooldown timer. Any fighter who burns their escape impulsively enters an absolute defensive vacuum, becoming fully vulnerable to guaranteed 100% one-shot combo execution.
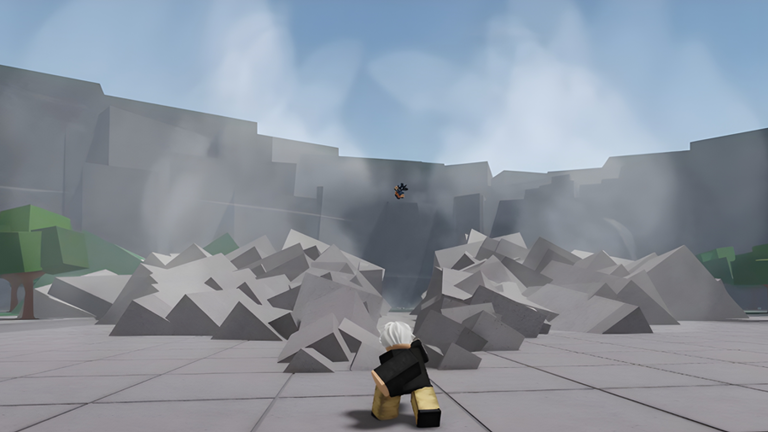
3. Wall Splat Geometry & Stun Extension
When a high-impact displacement ability propels an opponent into a vertical architectural surface within a 45-degree incidence angle, the Wall Splat mechanic triggers.
The target becomes temporarily pinned against the masonry before slumping downward in a 1.2-second hard stun state, granting the attacker ample time to step forward and initiate an entirely fresh M1 string.
Technical Specification Matrix: Character Archetypes in TSB
| Champion (Character) | Combat Archetype | True Combo Output | Execution Difficulty | Awakening Threat Rating |
|---|---|---|---|---|
| Saitama (The Strongest Hero) |
Brute force frontline juggernaut, wall-splat corner pressure, burst punches | 65% - 85% Max HP | Basic (Highly Accessible) | Absolute: Serious Punch One-Shots Entire Map |
| Garou (Hero Hunter) |
Flowing Water frame-trapping martial artist, endless true combo resets, parry counters | 75% - 100% Max HP (Touch of Death) | Advanced (High Skill Floor & Ceiling) | Supreme: Monster Awakening Disintegrates Space |
 Atomic Samurai (Blade Master)Miễn Phí: 0 KillsTướng Atomic Samurai trong The Strongest Battlegrounds Roblox với bộ chiêu thức One-Shot, phản đòn Side-Dash…Click to View Full Wiki Profile → |
Hypersonic swordsman, block piercing stabs, split-second parries | 60% - 80% Max HP | Intermediate | Lethal: Atomic Slash Cleaves Any Target Cleanly |
| Boros (Celestial Conqueror) → | Cosmic energy rusher, aerial divebomber, wide-area energy bombardment | 70% - 90% Max HP | Intermediate - High | Apocalyptic: CSRC Beam Levels City A Landmarks |
| Genos (Destructive Cyborg)Miễn Phí: 0 KillsTướng Genos trong The Strongest Battlegrounds Roblox với bộ chiêu thức One-Shot, phản đòn Side-Dash và…Click to View Full Wiki Profile → |
Long-range artillery zoning, aerial propulsion repositioning, area incineration | 55% - 75% Max HP | Intermediate | Infernal: Screen-Filling Core Incineration |
| Metal Bat (Brutal Demon)Miễn Phí: 0 KillsTướng Metal Bat trong The Strongest Battlegrounds Roblox với bộ chiêu thức One-Shot, phản đòn Side-Dash…Click to View Full Wiki Profile → |
Unstoppable Hyper Armor brawler, projectile deflecting bat, berserker scaling | 65% - 85% Max HP | Accessible - Intermediate | Berserker: Savage Tornado Invincibility at Low HP |
2. Visual Tier List Matrix Board: Authoritative Competitive Tier Matrix
The competitive tier matrix in The Strongest Battlegrounds evaluates characters based on neutral control, frame safety, combo extension capability, and comeback potential in 1v1 Ranked Duels:
These characters possess complete, unblemished kits with zero mechanical vulnerabilities, devastating corner carry, and the highest touch-of-death conversion rates in the game.
Masters of neutral control, packing unblockable guard-piercing tools or overwhelming momentum-based aerial gap closers.
Atomic Samurai (Blade Master)Miễn Phí: 0 KillsTướng Atomic Samurai trong The Strongest Battlegrounds Roblox với bộ chiêu thức One-Shot, phản đòn Side-Dash…Click to View Full Wiki Profile →Specialists who punish standard aggression through uninterruptible poise frames or sustained long-range kiting loops.
Metal Bat (Brutal Demon)Miễn Phí: 0 KillsTướng Metal Bat trong The Strongest Battlegrounds Roblox với bộ chiêu thức One-Shot, phản đòn Side-Dash…Click to View Full Wiki Profile →Genos (Destructive Cyborg)Miễn Phí: 0 KillsTướng Genos trong The Strongest Battlegrounds Roblox với bộ chiêu thức One-Shot, phản đòn Side-Dash và…Click to View Full Wiki Profile →Agile skirmishers relying on hit-and-run mobility to bait out enemy resources, or spatial telekinetics to manipulate crowd positioning.
Sonic (Deadly Ninja)Miễn Phí: 0 KillsTướng Speed-o'-Sound Sonic trong The Strongest Battlegrounds Roblox với bộ chiêu thức One-Shot, phản đòn Side-Dash…Click to View Full Wiki Profile →Tatsumaki (Wild Psychic)Miễn Phí: 0 KillsTướng Tatsumaki trong The Strongest Battlegrounds Roblox với bộ chiêu thức One-Shot, phản đòn Side-Dash và…Click to View Full Wiki Profile →3. Comprehensive Blueprint: 8 Standard Tactical Combat Decks
Each combat archetype in TSB possesses optimized combo routing designed to maximize damage conversion relative to the opponent's defensive cooldowns:
Route: 3x M1 + Hunter's Grasp + 3x M1 + Downslam + Dash Cancel + Lethal Whirlwind + Flowing Water
- Step 2: Immediately cancel into [Hunter's Grasp] to slam the opponent into the dirt.
- Step 3: Input 3 more M1 strikes, then press Space + M1 to execute an aerial Downslam.
- Step 4: Dash Cancel forward during ground impact, firing [Lethal Whirlwind Stream] to launch.
- Step 5: Conclude with [Flowing Water Fist] for total damage conversion.
- Delaying the Dash Cancel after Downslam allows the opponent to Tech Roll away.
- Attempting the route while the target holds Evasive allows them to counter-attack at Step 2.
Route: 3x M1 + Uppercut + Shove into Wall Splat + 3x M1 + Consecutive Punches
- Step 2: Orient camera toward the nearest wall and fire [Shove] to shatter their poise into the brickwork.
- Step 3: As the target slumps down from Wall Splat, dash forward and land 3 M1 strikes.
- Step 4: Channel [Consecutive Normal Punches] to vaporize the remainder of their health bar.
- The immense tick rate of Consecutive Punches generates massive Awakening energy.
Route: Pinpoint Cut (Guard Pierce) + Flash Step + 3x M1 + Atmos Cleave + Split Second Counter
- Flash Step behind the target and connect 3 M1 slashes.
- Unleash [Atmos Cleave], cleaving space with 8 consecutive shockwaves.
- Conclude by entering [Split Second Counter] stance to punish frantic panic retaliation.
- Maintain mid-range neutral spacing to dominate initial clash interactions.
Route: Blitz Shot (Poke) + Ignition Burst (Backdash) + Jet Dive (Divebomb) + Machine Gun Blows
- When the enemy dashes to close distance, trigger [Ignition Burst] to blast them back while jumping rearward.
- Ascend vertically using [Jet Dive], angling camera downward to crash into the target.
- Empty your arsenal via [Machine Gun Blows] on the grounded enemy.
- Exploit rooftops and high ground to fire Incinerate barrages with zero threat of retaliation.
Route: Grand Slam (Armor Absorption) + 3x M1 + Foul Ball + Dash Cancel + Beatdown
- Following the ground-pound stun, connect 3 M1 strikes.
- Fire [Foul Ball] for a mid-range stun, Dash Cancel forward, and execute [Beatdown] on the floored target.
- Foul Ball can bat enemy projectiles (Genos blasts, Sonic shurikens) directly back at their origin.
Route: Scatter Shurikens + Flash Strike + 3x M1 + Whirlwind Kick + Quick Slice
- Pierce through the target with [Flash Strike]. The lightning velocity frequently causes panic Evasive presses.
- Immediately pivot back, land 3 M1s, and execute [Whirlwind Kick] into the stratosphere.
- Finish with [Quick Slice] as the opponent plummets back downward.
- Never charge directly into Garou or Metal Bat when their counters or armor frames are primed.
Route: Energy Beam + Flash Step + 3x M1 + Meteoric Strike (Wall Splat) + Cosmic Rush
- Close distance with Flash Step, connecting 3 crisp M1s.
- Leap airborne to drop [Meteoric Strike], slamming the target into walls for a guaranteed Wall Splat.
- Follow up immediately with [Cosmic Rush] for continuous explosive hits.
- Moon Kick boots targets into orbit while CSRC wipes clean entire city sectors.
The Master Protocol: Tech Roll Timing + 20s Window Hunting + Counter Bait Punishment
- Across this window, the opponent is utterly defenseless against True Combos; unload your entire arsenal.
- When your own Evasive is down, back off behind geometry, spacing strictly in defensive neutral.
- Grants 0.4s of absolute invincibility frames, nullifying follow-up combo attempts cleanly.
4. Advanced Combat Physics: Frame Data, Ragdoll Tech & Guard Mechanics
To surpass casual play and enter the upper echelon of TSB competitors, one must understand the underlying mathematical mechanics governing hitboxes and frame advantage:
Frame Data Analysis Table: Startup, Active & Recovery States
Every attack progresses through three distinct phases: Startup, Active, and Recovery. Knowing these frame counts allows you to punish missed swings reliably:
| Action / Ability | Startup Frames (Windup) | Active Frames (Damage) | Recovery Frames (Whiff) | Block Interaction |
|---|---|---|---|---|
| Standard M1 Strike | 4 - 6 Frames (0.06s - 0.10s) | 3 Frames | 12 Frames (Safe) | Blocked completely, minor pushback |
| Saitama: Shove | 14 Frames (0.23s) | 4 Frames | 22 Frames (Punishable) | Guard Break (Shatters shield) |
| Garou: Hunter's Grasp | 10 Frames (0.16s) | 6 Frames | 28 Frames (Heavily punishable) | Unblockable Grab (Ignores guard) |
| Atomic Samurai: Pinpoint Cut | 8 Frames (0.13s) | 3 Frames | 16 Frames | Pierce Guard (Stabs through) |
| Metal Bat: Grand Slam | 18 Frames (0.30s) | 8 Frames | 30 Frames | Hyper Armor (Uninterruptible) |
Guard Break vs. Unblockable Grabs: Tactical Demarcation
Many players conflate Guard Breaks with Unblockable Grabs, leading to severe defensive misplays in neutral:
- Guard Break: Strikes that interact with an active block by shattering the defensive shield with a glass-breaking sound effect, putting the defender into a 1.5s daze. Examples: Saitama's Shove, Metal Bat's secondary swing.
- Unblockable Grab: Moves that completely ignore the existence of a block stance. Whether the defender is blocking or not, the attack connects and triggers its throw animation. Examples: Garou's Hunter's Grasp, Tatsumaki's telekinetic choke.
- The Only Counter: Against both Guard Breaks and Grabs, holding Block guarantees defeat. The only reliable defense is lateral evasion (Side Dash) or backpedaling to make the move whiff entirely.
5. Frequently Asked Questions: 20 Critical Inquiries for The Strongest Battlegrounds
An exhaustive technical reference resolving the most persistent inquiries from competitive duelists:
Question 1: How can players reliably train M1 Priority timing in neutral clashes?
Winning neutral M1 trades is not about frantic clicking. It requires observing the opponent's approach strides and initiating your swing precisely as they enter your maximum reach envelope.
The Side Dash Feint is the most effective training technique: dash laterally to avoid the enemy's opening punch, then immediately whip your camera to strike their flank during their recovery frames.
Set up a private server with a practice partner and practice calibrated 0.2s pause clicking to develop muscle memory for each character's specific hitbox reach.
Question 2: What is the exact mechanical input sequence for Dash Cancelling?
Dash Cancelling eliminates sluggish recovery animations following attacks or Downslams, instantly returning your character to actionable neutral.
The precise input: After executing a Downslam (Space + M1), press Q combined with W (forward) or A/D (lateral) the exact millisecond your fist strikes the pavement to cancel the standing animation.
Mastering this input reduces your gap-closing interval from 0.8s down to 0.2s, transforming loose chains into inescapable True Combos.
Question 3: What defensive protocols should be adopted when your Evasive is on cooldown?
When your 20-second Evasive timer is ticking, you inhabit an extreme danger zone. You must immediately adopt a defensive spacing posture.
Utilize environmental terrain, backdash rhythmically, and keep your guard active. Prime parry counters like Atomic Samurai's Split Second or Garou's Prey's Peril to discourage reckless enemy rushdowns.
If struck down, time your Tech Roll on ground impact to gain 0.4s of invincibility, allowing you to slip away from lethal corner traps.
Question 4: Which character commands the most dominant Awakening in the game?
In terms of raw, unadulterated one-shot deletion, Saitama's Serious Punch stands unchallenged, wiping out any target caught in its line of fire regardless of distance.
However, for sustained engagement pressure and maneuverability, Boros (Meteoric Burst) and Garou (Monster Awakening) are rated higher by pros due to their hypersonic mobility and omnidirectional kill potential.
In high-stakes 1v1 Ranked matches, popping a clean Awakening almost always guarantees the round victory.
Question 5: How can a player visually identify an incoming Counter parry stance?
Counter stances (Garou's Prey's Peril, Samurai's Split Second) feature telltale telegraphing: the character freezes in place, lowers their center of gravity, and emits a subtle distortion aura.
If an opponent abruptly halts aggression and stands motionless at close quarters, they are almost certainly baiting your punch with a counter. Cease attacking immediately and backdash or raise your guard.
Counter stances last only 1.0 to 1.5 seconds. As soon as the stance dissipates, the opponent is trapped in recovery frames, presenting a prime window for punishment.
Question 6: Why is an Uppercut often strategically superior to a Downslam?
An Uppercut launches the target into the air without putting them into a grounded ragdoll state. This prevents them from using the Spacebar Tech Roll to escape.
While suspended airborne, abilities with horizontal vectors (like Saitama's Shove or Garou's Hunter's Grasp) connect with 100% reliability.
Consequently, tournament fighters favor Uppercuts near walls to transition directly into inescapable Wall Splat sequences.
Question 7: How drastically does network latency (Ping) impact competitive TSB performance?
TSB is an intensely frame-sensitive combat game. An ideal latency threshold is sub-60ms, where M1 clashes and Evasive inputs register in true real-time.
At 150ms+ latency, severe rollback artifacts occur: clean M1s fail to register hitstun, or Evasive inputs trigger client-side but get rubberbanded back into enemy combos.
Always select the geographic server closest to your physical location (e.g., Singapore or Tokyo for Southeast Asian duelists) to preserve optimal input responsiveness.
Question 8: How do you counter passive turtlers who hold Block in corners?
Passive players often back into wall corners holding Block, hoping you will blindly strike their shield. Never engage them with basic M1 punches.
Instead, deploy Guard Break abilities like Saitama's Shove or shield-piercing thrusts like Samurai's Pinpoint Cut to instantly shatter their guard.
Furthermore, Garou's Hunter's Grasp completely ignores Block, turning their corner position into a self-imposed death trap.
Question 9: What is the competitive performance gap between PC keyboard/mouse and Mobile?
PC players command a massive advantage in 360-degree camera flick velocity and complex multi-key inputs such as Dash Cancels and mid-combo Shove orientation.
On mobile touchscreens, simultaneously manipulating the camera and hitting ability icons requires immense finger dexterity (typically demanding a 4-finger claw grip).
Mobile players can bridge this gap by enabling Shift Lock and resizing critical action buttons within the settings menu for faster thumb acquisition.
Question 10: How does the Ultimate Awakening meter accumulate during combat?
The Awakening bar builds through two primary channels: dealt damage against opponents and sustained damage received from enemy combos.
Metal Bat in particular generates Awakening energy at an accelerated rate when absorbing damage due to his innate Fighting Spirit passive.
Skilled players closely track the opponent's ultimate icon; when it blazes full, they maintain strict spacing to avoid catastrophic one-shot awakening skills.
Question 11: How do you evade Boros' Collapsing Star Roaring Cannon (CSRC) in City A?
Boros' CSRC unleashes a colossal conical energy beam that annihilates everything along its trajectory.
As Boros hovers to gather celestial charge, immediately dash laterally (90 degrees relative to his facing vector) or break line of sight behind indestructible skyscrapers.
Never attempt to retreat in a straight line, as the beam's range covers nearly the full expanse of the arena.
Question 12: What distinct advantages do jumping Air M1 strikes provide over grounded swings?
Jumping into an Air M1 extends your reach slightly forward due to the character model leaning into the swing.
Additionally, being airborne helps you bypass low-sweeping ground hitboxes such as ankle sweeps or localized ground shockwaves.
This represents a signature engagement tactic for Atomic Samurai players seeking an unexpected diagonal angle of attack.
Question 13: How can players effectively counter a Genos who continuously kites from range?
Combating an adept Genos demands iron discipline. Do not sprint directly into his projectile paths; weave diagonally while tapping Block against incoming blasts.
When Genos initiates Jet Dive to crash down from the sky, execute a side dash the instant he contacts the pavement to dodge the impact, then punish him during his landing lag.
Genos possesses mediocre melee frame data and lacks dedicated defensive counters; once cornered, he disintegrates swiftly.
Question 14: What is the tactical purpose of Block Fluttering?
Rather than holding the Block key continuously (which reduces character movement speed), Block Fluttering involves tapping the guard key rapidly at high frequency.
This preserves normal footstep velocity while keeping the player perpetually primed to deflect sudden M1 ambush strikes.
Furthermore, it severely complicates the opponent's timing when trying to land Guard Break moves like Shove or Pinpoint Cut.
Question 15: How should a fighter escape corner entrapment when pressured against a wall?
When cornered, avoid jumping aimlessly, as airborne hitboxes make you an easy target for Wall Splat conversions.
If Evasive is ready, wait for the opponent to commit to a knockback strike, then pop Evasive to slip behind them toward open arena turf.
If Evasive is on cooldown, wait for the attacker to finish their string, then immediately unleash an AoE knockback or dash along the open masonry edge to escape.
Question 16: Which movesets offer the best area-of-effect (AoE) disruption in Free-For-All (FFA) lobbies?
In chaotic multi-player FFA brawl rooms, the movesets of Tatsumaki (Wild Psychic) and Genos shine with unmatched crowd suppression.
Tatsumaki's stone storm pulls and pulverizes entire clusters of combatants, while Genos' Incinerate blankets vast ground sections from above.
Metal Bat's Grand Slam is likewise fantastic for wiping clusters while protected by impenetrable Hyper Armor poise.
Question 17: Should players utilize mechanical macro software for automated combo execution?
Mechanical keyboards with rapid-trigger switches (such as Optical or Magnetic switches) genuinely enhance input timing for M1s and Dash Cancels.
However, using automated third-party macro software violates game integrity rules and carries permanent ban penalties on Yielding Arts servers.
Furthermore, static macros fail against unpredictable human Evasives or uneven terrain; only manual input mastery allows you to adapt to live duel flow.
Question 18: Which character is best suited for beginners entering the competitive TSB scene?
Saitama (The Strongest Hero) is the premier starting champion. His kit is straightforward, his punches have generous hitboxes, and his base damage is remarkably forgiving.
Shove teaches beginners how to punish turtlers, while Consecutive Punches locks targets automatically without demanding complex camera flicking.
Once comfortable with fundamental M1 timing and Dash Cancels on Saitama, players can smoothly transition into high-skill specialists like Garou or Samurai.
Question 19: What graphical configurations optimize frame rate and minimize input latency?
Within Roblox settings, switch graphics to Manual and lock the slider at level 3 or 4. This maintains sharp draw distance while stripping heavy particle processing.
In TSB's in-game settings menu, disable "Dynamic Shadows" and "Screen Shake" to preserve rock-solid visual orientation during rapid combo rotations.
Maintaining a locked 60 FPS is paramount for reacting to opponent startup frames and landing precision parries.
Question 20: What is the single most vital piece of strategic advice for aspiring duelists?
The foundational tenet of master-class play is: "Master Neutral Spacing, Respect the 20-Second Evasive Clock, and Keep a Composed Mind."
Never let impatience drive you into reckless swings. Observe, bait out enemy resources, exploit their recovery windows, and punish with clinical precision.
Through disciplined practice, an intimate grasp of frame data, and spatial mastery of the battleground, you will carve your name among the elite champions of The Strongest Battlegrounds!