
1. Overview of Awakening Mechanics, Invulnerability Frames & Guard Break Systems in The Strongest Battlegrounds
Within the high-velocity combat arena of The Strongest Battlegrounds, the defining moment arrives when a combatant's Ultimate Rage Meter reaches a full 100% capacity and they trigger the [G] activation key. Entering the Awakening state fundamentally redefines the combat ecosystem, converting the player's chosen archetype into a cataclysmic powerhouse equipped with map-altering destruction, screen-shaking audiovisual impacts, and raw damage thresholds capable of sending opponents straight back to the respawn lobby off a single clean connection.
However, in a competitive environment dominated by seasoned players who execute precise Side Dashes, Frame Traps, and Ragdoll Cancels, blindly throwing out Awakening ultimates will swiftly convert you into an easy target for lethal counterattacks. Mastering the mathematical realities of Startup Frames, Invulnerability Windows (i-Frames), and Guard Break Properties serves as the indispensable foundation for converting your Awakening mode into a flawless, dominant killstreak.
1. Awakening Invulnerability Frames [G Activation]
Upon depressing the [G] key to ignite Awakening, the avatar enters a dedicated transformation sequence lasting precisely 45 frames (0.75 seconds under standard 60 FPS tick rates). Throughout this exact window, the character is granted 100% unconditional immunity against all incoming damage profiles, status stuns, and environmental ragdoll impulses.
Concurrently, an explosive omnidirectional kinetic shockwave radiates outward across a 12-stud perimeter, violently launching any encroaching melee aggressors backwards, shattering active enemy pressure chains, and instantly reversing lethal situations when your health bar is hanging on the brink of death.
2. Absolute Guard Break Mechanics
Unlike standard neutral light strikes that can be safely absorbed via defensive blocking [F key], supreme Awakening ultimates—most notably Omnidirectional Serious Punch, Serious Table Flip, and Atomic Slash—feature innate Absolute Guard Break characteristics.
Should an adversary attempt to hold their guard during the impact frame, their defensive barrier instantly fractures with brilliant golden spark particles, subjecting the victim to full 100% uncapped damage while plunging their character model into prolonged hitstun with zero recourse.
3. Downslam Ground-Pound Setup Technique
Due to the substantial windup animations associated with top-tier Awakening moves (typically ranging between 15 and 36 startup frames, or roughly 0.25s to 0.60s), uncalculated raw activations leave ample reaction time for evasive opponents to perform a quick Side Dash.
To guarantee a 100% unreactable confirmation, elite duelists weave a relentless light attack sequence, combining jump [Space] and left-click [M1] on the 4th tempo to execute a lethal Downslam. This downward ground impact enforces 18 frames of hard grounded immobility, pinning the adversary perfectly for the ultimate finish.
Comparative Analysis of Awakening Archetypes in The Strongest Battlegrounds
| Representative Character | Awakening Identity | Ultimate Signature Move | Maximum Damage Output | Combo Execution Difficulty |
|---|---|---|---|---|
| Saitama (The Strongest Hero) | Serious Mode | Absolute One-Hit KO, massive global arena terrain disruption | 100% (Instant Elimination) | Easy to Intermediate |
| Garou (Hero Hunter) | Cosmic / Monster Form | Lethal Counter Stance, lockdown claw flurry barrage | 100% (Upon Counter Trigger) | Very High (Demands strict baiting) |
| Atomic Samurai (Blade Master) | Sword Saint | Vacuum blade tempest piercing guard, aerial suspension | 85% - 95% | High (Precise spacing required) |
| Genos (Destructive Cyborg) | Core Overdrive | Colossal nuclear plasma beam, sustained burn ticking damage | 80% - 90% | Moderate (Trajectory alignment) |
| Metal Bat (Brutal Demon) | Fighting Spirit Max | Inverse health scaling, devastating shockwave bat swings | 70% - 100% (HP dependent) | Moderate |
2. Visual Tier List Matrix Board: The Definitive Awakening Ultimates Ranking
The competitive tier matrix ranks every premier Awakening move based upon verified in-game telemetry, analyzing raw percentage damage, frame data startup delays, effective area-of-effect radii, and guard penetration reliability:
These iconic masterstrokes possess unconditional lethality, instantly wiping the victim's entire vitality pool upon contact regardless of defensive blocking or active health regeneration buffs.
Devastating moves capable of ignoring standard defensive guarding, leaving the victim in critical red-health status and easily confirmable into an immediate knockout via a single followup hit.
Specialized ultimates equipped with gravitational pulls, kinematic traps, and inescapable grab sequences that enable players to effortlessly chain further offensive combinations.
Techniques featuring near-zero startup frames (under 10 frames), giving opponents almost zero visual telegraph to execute defensive Side Dashes, making them quintessential 1v1 duel-closers.
3. Comprehensive Master Guide: 8 Lethal Awakening Tactical Decks
To secure maximum kill efficiency across your 45-second Awakening duration, players must rigorously coordinate their light attack tempos, ground-pound downslams, and ultimate activation timing:
Saitama Protocol: 3-Hit M1 Chain + Downslam Ground Pound + Omnidirectional Serious Punch
- Ultimate Weapon: Omnidirectional Serious Punch (Slot 4 or G key)
- Crucial Prerequisite: Confirm opponent has exhausted their Ragdoll Cancel cooldown
- Step 2: Input [Space] jump combined with left-click to execute a Downslam ground pound, forcing the adversary into an 18-frame hard grounded state.
- Step 3: Immediately queue [Omnidirectional Serious Punch]. Relativistic clones envelop the target, followed by a guaranteed, unblockable 100% terminal strike.
Tectonic Protocol: Uppercut Setup + Serious Table Flip Collapse
- Ultimate Weapon: Serious Table Flip (Subterranean crust upheaval)
- Ideal Context: Multi-target melee scrums (3+ clustered players)
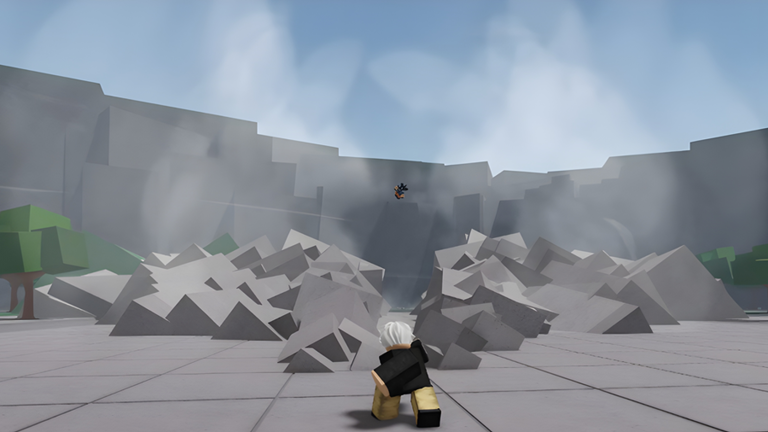
- Step 2: Trigger [Serious Table Flip]. Saitama embeds his palms into the bedrock, hurling monumental crust segments skyward.
- Step 3: Massive geological debris rains downward across the forward sector, annihilating all defensive blocks and inflicting 95% AoE damage.
Garou Protocol: Feigned Vulnerability + Final Hunt Lethal Counter
- Signature Technique: Final Hunt / Death Counter
- Strategic Mindset: Feign recovery lag to bait opponent into rushing with an ultimate or dash
- Step 2: The microsecond the adversary dashes in with a strike, trigger [Final Hunt].
- Step 3: Enemy hitbox contact initiates the death chain animation: Garou phases behind their neck, counters their offensive momentum, and shreds 100% of their vitality.
Atomic Samurai Protocol: Pinpoint Cut Stun + Guard-Piercing Atomic Slash
- Ultimate Chain: Pinpoint Cut (8-frame draw) into Atomic Slash
- Effective Spacing: Close to medium melee range (15-30 studs)
- Step 2: In the exact micro-window of the stagger, ignite [Atomic Slash].
- Step 3: Over 100 intersecting vacuum blade waves suspend the target mid-air, slicing cleanly through [F] blocking and erasing 85% of their vitality pool.
Genos Protocol: Corner Trap Blitz Dash + Maximum Capacity Incineration
- Ultimate Weapon: Maximum Capacity Incineration
- Optimal Geometry: Backing opponent against solid architectural barriers
- Step 2: Unleash [Maximum Capacity Incineration] squarely into the confined quadrant.
- Step 3: Sustained nuclear thermal pressure engulfs the adversary across 4 full seconds, preventing lateral evasions and evaporating their health pool.
Metal Bat Protocol: Passive Damage Stacking + Grand Slam Home Run One-Hit
- Ultimate Weapon: Grand Slam Home Run
- Trigger Threshold: When own health dips below 25% for maximum fighting spirit
- Step 2: Trigger Awakening [G] to gain i-frame immunity and temporary shielding.
- Step 3: Wind up [Grand Slam Home Run]. Amplified by the extreme missing HP multiplier, the swing becomes an unblockable 100% One-Hit KO that smashes through anything.
Tatsumaki Protocol: Gravitational Ground Lock + Celestial Meteor Crash
- Ultimate Weapon: Crushing Meteor Gravitation
- Core Trait: Completely locks down enemy sprint and dash mechanics
- Step 2: Channel and pull down a titanic celestial asteroid directly from high orbit.
- Step 3: Meteor impact detonates for 75% raw damage while gouging massive craters that scatter adjacent combatants.
Sonic Protocol: Flash Step Phasing + Explosive Shuriken Blitz
- Signature Skill: Explosive Shuriken Blitz
- Combat Style: Supersonic hit-and-run harassment
- Step 2: Unload [Explosive Shuriken Blitz] right into the victim's vulnerable blindspot.
- Step 3: Cascading explosive detonations induce continuous flinch frames, draining 70% vitality before they can turn to guard.
4. Comprehensive Technical Specification Matrix: Top 10 Awakening Moves
Empirical measurements detailing raw percentage damage, frame startup delays, guard penetration properties, and effective hitbox radii extracted directly from the physics engine:
| Move Name | Archetype | Damage (% HP) | Startup Frames | Guard Property | Effective Radius |
|---|---|---|---|---|---|
| Omnidirectional Serious Punch | Saitama (The Strongest Hero) | 100% (One-Hit KO) | 24 frames (0.40s) | Absolute Guard Break | 150 Studs |
| Serious Table Flip | Saitama (The Strongest Hero) | 95% - 100% | 36 frames (0.60s) | Full Guard Break | 200 Studs |
| Final Hunt (Death Counter) | Garou (Hero Hunter) | 100% (Counter Confirmation) | 2 frames (0.03s) | Absolute Counter | 10-stud contact box |
| Atomic Slash | Atomic Samurai (Blade Master) | 85% | 16 frames (0.26s) | Full Guard Bypass | 45-stud frontal cone |
| Maximum Capacity Incineration | Genos (Destructive Cyborg) | 80% - 90% | 20 frames (0.33s) | Thermal Guard Break | 80-stud linear beam |
| Grand Slam Home Run | Metal Bat (Brutal Demon) | 70% - 100% (HP scaled) | 18 frames (0.30s) | Impact Guard Break | 25-stud swing arc |
| Lethal Whirlwind Stream | Garou (Hero Hunter) | 75% | 14 frames (0.23s) | Vacuum Pull | 30-stud radius vortex |
| Crushing Meteor Gravitation | Tatsumaki (Wild Psychic) | 60% - 75% | 22 frames (0.36s) | Gravitational Pin | 180-stud arena radius |
| Dragon Fangs | Garou (Hero Hunter) | 65% | 12 frames (0.20s) | Forced Grab Command | 12-stud forward grab |
| Explosive Shuriken Blitz | Sonic (Deadly Ninja) | 55% - 70% | 8 frames (0.13s) | Blockable by [F] | 20-stud perimeter |
5. Keybindings Optimization, Rage Meter Management & Emergency Wakeup Tactics
The timing of your Awakening activation separates triumphant comebacks from catastrophic early eliminations. Incorporate these foundational combat disciplines:
1. Grounded Wakeup Awakening [G Recovery]
When knocked flat on the terrain with a full 100% Rage bar, resist the urge to tap Ragdoll Cancel [Space]. Remain grounded until the opponent aggressively dashes in for a downed follow-up, then hit [G]. Your avatar stands up instantly with 45 frames of invulnerability, erupting with a radial shockwave that blows back the aggressor and completely flips momentum.
2. Disciplined Ragdoll Cancel Management
Ragdoll Cancel carries a hefty 15 to 20-second recovery period. Save it strictly for surviving Downslams when the opponent is queuing their ultimate. If an adversary is merely landing basic light M1 strings, absorb the chipped damage rather than squandering your primary escape lifeline.
3. Graphics Tuning to Prevent Frame Drops
Moves like Table Flip and Atomic Slash feature intensive particle density that causes severe frame drops on unoptimized hardware. Set Roblox Graphics Quality to level 3 or 4 to lock in a smooth 60 FPS or 144 FPS throughout intense particle explosions.
6. Survival Strategies When an Opponent Awakens (Kiting & Burnout Protocols)
When an adversary awakens, their godlike power endures for exactly 45 seconds. Successfully surviving this 45-second onslaught ensures an 80% victory probability once their form expires:
1. The 45-Second Survival Run (Kiting Protocol)
Never engage in direct head-on trades while an opponent holds their Awakening state. Utilize skyscraper geometries, concrete pillars, and architectural barriers to repeatedly break Line of Sight (LoS).
Weave backward jump dashes while maintaining sprint speed. If the adversary aggressively closes distance, deploy ranged projectiles or zoning pokes to disrupt their forward velocity.
2. Visual Telegraph Reading for Reactive Side Dashes
Every lethal One-Hit ultimate displays a distinct windup telegraph: Saitama visibly places both palms downward prior to Table Flip, and Garou adopts a stationary defensive stance before Death Counter.
The instant this animation begins, immediately buffer a lateral Side Dash [Q] + [A/D] to clear the active hitbox vector before damage resolution occurs.
3. Punishing the Post-Awakening Burnout Window
The moment the 45-second Awakening duration lapses, the opponent suffers a 1.5-second Burnout recovery freeze with all basic skills locked on maximum cooldowns.
This represents your prime offensive opening: Pivot immediately into full aggressive pressure, unload your core M1 strings, and eliminate the defenseless target without resistance.
7. Comprehensive FAQ: 20 Deep-Dive Technical Answers for The Strongest Battlegrounds Awakening
Detailed academic solutions addressing every intricate mechanic, matchup interaction, and frame data inquiry concerning Awakening modes:
FAQ 1: How can a player charge their Awakening Ultimate Meter at maximum speed?
The Ultimate Meter charges via two distinct streams: Dealing outgoing damage to adversaries and absorbing incoming damage. Completing full 4-hit M1 strings combined with skill extensions yields the highest gauge increase (approximately 15% to 20% per completed combo chain).
Furthermore, participating in central arena multi-target scrums enables collateral splash damage that can fully cap your Rage gauge in under 60 seconds of continuous combat.
FAQ 2: How can a player evade Saitama's Omnidirectional Serious Punch?
Saitama's Omnidirectional Serious Punch is a true 100% One-Hit KO that cannot be blocked with [F]. However, it possesses a 24-frame (0.40s) startup animation where clone afterimages manifest.
If you are in neutral stance and not pinned by a Downslam, inputting a rapid lateral Side Dash [Q] + [A/D] the moment the afterimages appear clears the lock-on tracking cylinder and avoids damage entirely.
FAQ 3: Does Serious Table Flip cover the entirety of the arena map?
Serious Table Flip features an effective damage radius of 200 studs extending in a forward cone from Saitama's point of impact, covering roughly 60% of the central courtyard. While every player on the server experiences screen shake and sees the massive plate in the sky, damage only registers within the 200-stud perimeter.
To survive, sprint immediately toward the map's outer perimeter or ascend the highest rooftop structures the moment Saitama places his hands on the ground.
FAQ 4: Can Garou's Final Hunt Counter absorb and counter Saitama's Serious Punch?
Yes. Final Hunt operates on absolute counter priority. Any incoming physical hitbox that strikes Garou during his defensive stance—including Saitama's Serious Punch—triggers the full counter cinematic.
Garou breaks the incoming strike, phases behind Saitama, and shreds 100% of Saitama's health bar. This makes Awakened Garou an existential threat to careless Saitama players.
FAQ 5: How long do the invulnerability frames last upon pressing [G]?
The invulnerability window lasts precisely 45 frames (0.75 seconds at 60 FPS). During this transformation interval, your character is completely immune to damage and knockback while an energy aura surrounds the model.
Once the animation concludes, you can immediately initiate combat while nearby adversaries remain staggered from the outward shockwave.
FAQ 6: Can Atomic Samurai's Atomic Slash be blocked using the [F] key?
No. Atomic Slash possesses innate Guard Bypass properties. If you hold [F] to block, the vacuum slashes slice directly through your guard posture, dealing the full 85% damage value.
The only viable defense is performing a reactive Side Dash to exit the forward cone or jumping high above the sword trajectory before the first cut registers.
FAQ 7: Under what circumstances does Metal Bat deal maximum ultimate damage?
Metal Bat operates on the Fighting Spirit passive mechanic, which increases the damage coefficient of all attacks proportionally to missing health.
When Metal Bat's HP drops below 20%, his Grand Slam Home Run transitions into a guaranteed 100% One-Hit KO, making him the premier comeback brawler in the game.
FAQ 8: How long does the Awakening transformation state persist?
Standard Awakening persists for exactly 45 seconds. During this period, the golden energy gauge steadily drains toward zero.
If eliminated while in Awakening mode, the state immediately terminates, and the player respawns with a depleted 0% Rage gauge.
FAQ 9: Can Genos's Maximum Capacity Incineration be interrupted during windup?
Yes. During the initial 20 frames where Genos extends his arms to focus plasma energy, he lacks Super Armor protection.
If an opponent lands an M1 strike or interrupt kick within these 20 frames, the entire ultimate is canceled and placed on full cooldown with zero thermal output.
FAQ 10: Does Garou's Lethal Whirlwind Stream pull in targets who are holding guard?
Yes. The vacuum vortex exerts a kinematic gravitational pull on all targets within 30 studs regardless of whether [F] guard is active.
Once pulled into the center, the rapid slashes overwhelm guard durability, shattering defensive postures and applying full 75% combo damage.
FAQ 11: How do you visually differentiate a Block Break move from a Blockable strike?
Observe the visual telegraph (VFX): Block Break moves exhibit intense red particle flare or prolonged windup stances accompanied by sharp audio cues.
Blockable moves typically display blue, white, or standard weapon trails. Whenever red particle telegraphs appear, release [F] immediately and execute a Side Dash.
FAQ 12: Can Tatsumaki's Crushing Meteor Gravitation be avoided by jumping?
No. Airborne players cannot evade it because the telekinetic wave amplifies gravity across the arena, forcefully grounding all floating avatars flat to the surface.
Damage can be partially mitigated by buffering a Ragdoll Cancel right at the meteor's detonation frame to catch temporary i-frames.
FAQ 13: What is the exact input sequence to execute a flawless Downslam ground pound?
Land three standard light attacks [M1] x 3, then simultaneously hold jump [Space] and input the 4th [M1] strike.
Your character vaults into the air and drives the adversary into the earth, inflicting 18 frames of hard grounded hitstun that guarantees the follow-up ultimate connects.
FAQ 14: Which Awakening character possesses the highest mobility and repositioning tools?
Sonic (Deadly Ninja) reigns supreme in mobility. His dash mechanics transform into supersonic flash-step afterimages that traverse huge distances instantly.
Sonic can close 100 studs in half a second or cleanly disengage from enemy ultimate blast zones with zero positioning penalty.
FAQ 15: What happens when two Awakened players clash ultimates simultaneously?
Outcome is governed by attack priority: Reactive counter stances (such as Garou's Final Hunt) always override active offensive strikes (including Serious Punch).
If two active offensive strikes collide (e.g., Saitama's Serious Punch vs. Metal Bat's Grand Slam), the physics engine generates a massive clash explosion that propels both players backward without awarding a One-Hit KO.
FAQ 16: Can a player charge their Ultimate Meter on training dummies in the lobby?
No. Training dummies located in the safe lobby serve exclusively for damage testing and M1 rhythm practice; they do not generate Rage meter points.
Ultimate charge accumulates exclusively through active PvP interactions within the main combat arena.
FAQ 17: Does Garou's Dragon Fangs grapple multiple targets simultaneously?
No. Dragon Fangs is strictly a single-target command grab. Garou locks onto the single closest target directly in front of him to execute the wall-slam sequence.
However, when Garou flings the victim at the end of the sequence, the hurled body acts as a projectile, knocking down and chipping any players struck along its flight path.
FAQ 18: Why is Ragdoll Cancel disabled when trapped inside Atomic Slash?
Atomic Slash enforces an Aerial Stun Lock state. The 100+ vacuum slashes continuously elevate the target mid-air, preventing ground contact.
Game physics mandate that Ragdoll Cancel can only trigger once a player model touches the ground. Consequently, victims must endure the full sequence until the final slash connects.
FAQ 19: Can the 45-second Awakening timer be extended in combat?
While 45 seconds is the baseline limit, securing confirmed eliminations (kills) while in Awakening refunds a minor amount of energy (roughly 3 to 5 bonus seconds per elimination).
In chaotic multi-player public servers, skilled brawlers can prolong their Awakening state beyond 60 seconds by chaining consecutive multi-kills.
FAQ 20: What is the optimal progression roadmap to master all Awakening characters?
Phase 1: Begin with Saitama to develop fundamental M1 string rhythms and Downslam ground-pound setups before confirming Serious Punch.
Phase 2: Transition to Genos and Atomic Samurai to practice beam alignment angles, spatial geometry, and cone spacing.
Phase 3: Master Garou, whose Final Hunt requires psychological baiting, precise reads, and sub-2 frame counter timing.